Practical guide for creators
How to use FFmpeg online without installing and still get clean, share-ready videos
Quick answer: To use FFmpeg online without installing, open VidTL, import your media, go to Tools, choose FFmpeg, paste a command, and run it. Download the processed file when it finishes. For most people, the fastest start is using the built-in Quick Examples and changing only the input and output filenames.
What you will get from this method
Most people searching how to use ffmpeg online without installing want one thing: get the job done now, without setup headaches. This process is built for exactly that. You can cut a clip, remove audio, swap audio, resize for social media, or extract sound for podcasts and voiceover edits. You stay inside one browser tab, and you can move from one task to the next quickly. There is no download, no install, and no command line.
I have used this workflow for tutorial clips, short-form social videos, and quick client revisions where speed matters more than building a desktop editing environment. It works best when your goal is practical output: a file that uploads correctly, plays smoothly, and sounds right on phones and laptops.
Best use cases
Fast workflow patterns
- → Trim a long recording into short highlights
- → Convert file types before upload
- → Create smaller files for faster sharing
- → Fix audio by replacing noisy tracks
- → Prepare clips for YouTube, TikTok, and IG
Pre-flight
Before you start: 60-second checklist
Keep names simple
Use file names like input.mp4 or voice.mp3. It keeps your commands cleaner.
Know your goal
Pick one outcome first: trim, compress, mute, or resize. Clear goal means fewer retries.
Start with a copy
Keep your original media untouched. Save results to new output names each run.
Watch output size
If a file is very large, split tasks into smaller exports for smoother browser processing.
Implementation
Step-by-step: how to use FFmpeg online in VidTL
Follow these steps in order the first time. Once you do it once, the whole flow becomes fast and repeatable. The interface labels below match what you will see inside the editor.
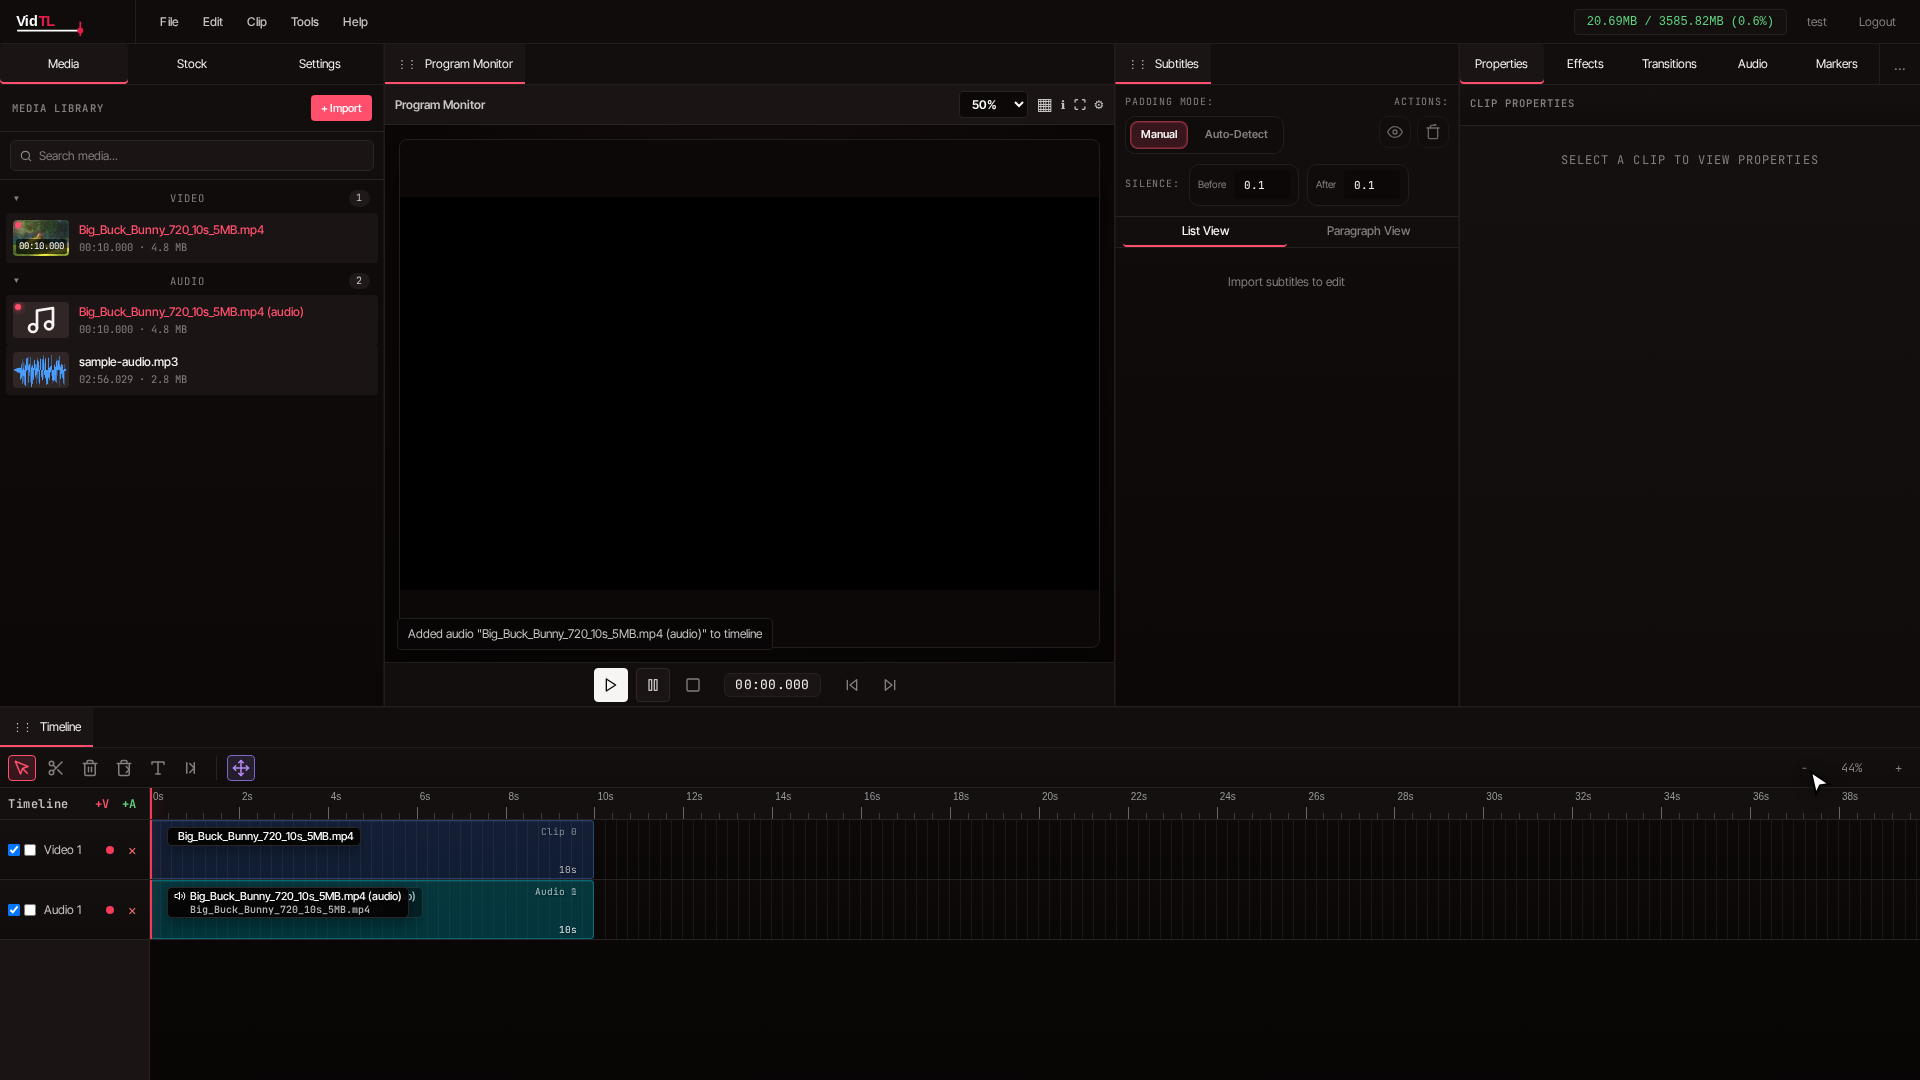
Open the editor and import your files
In the Media Library section, click + Import and choose your source files. Wait until they appear in the list before moving on. If you are replacing audio, import both your video and your new audio track now.

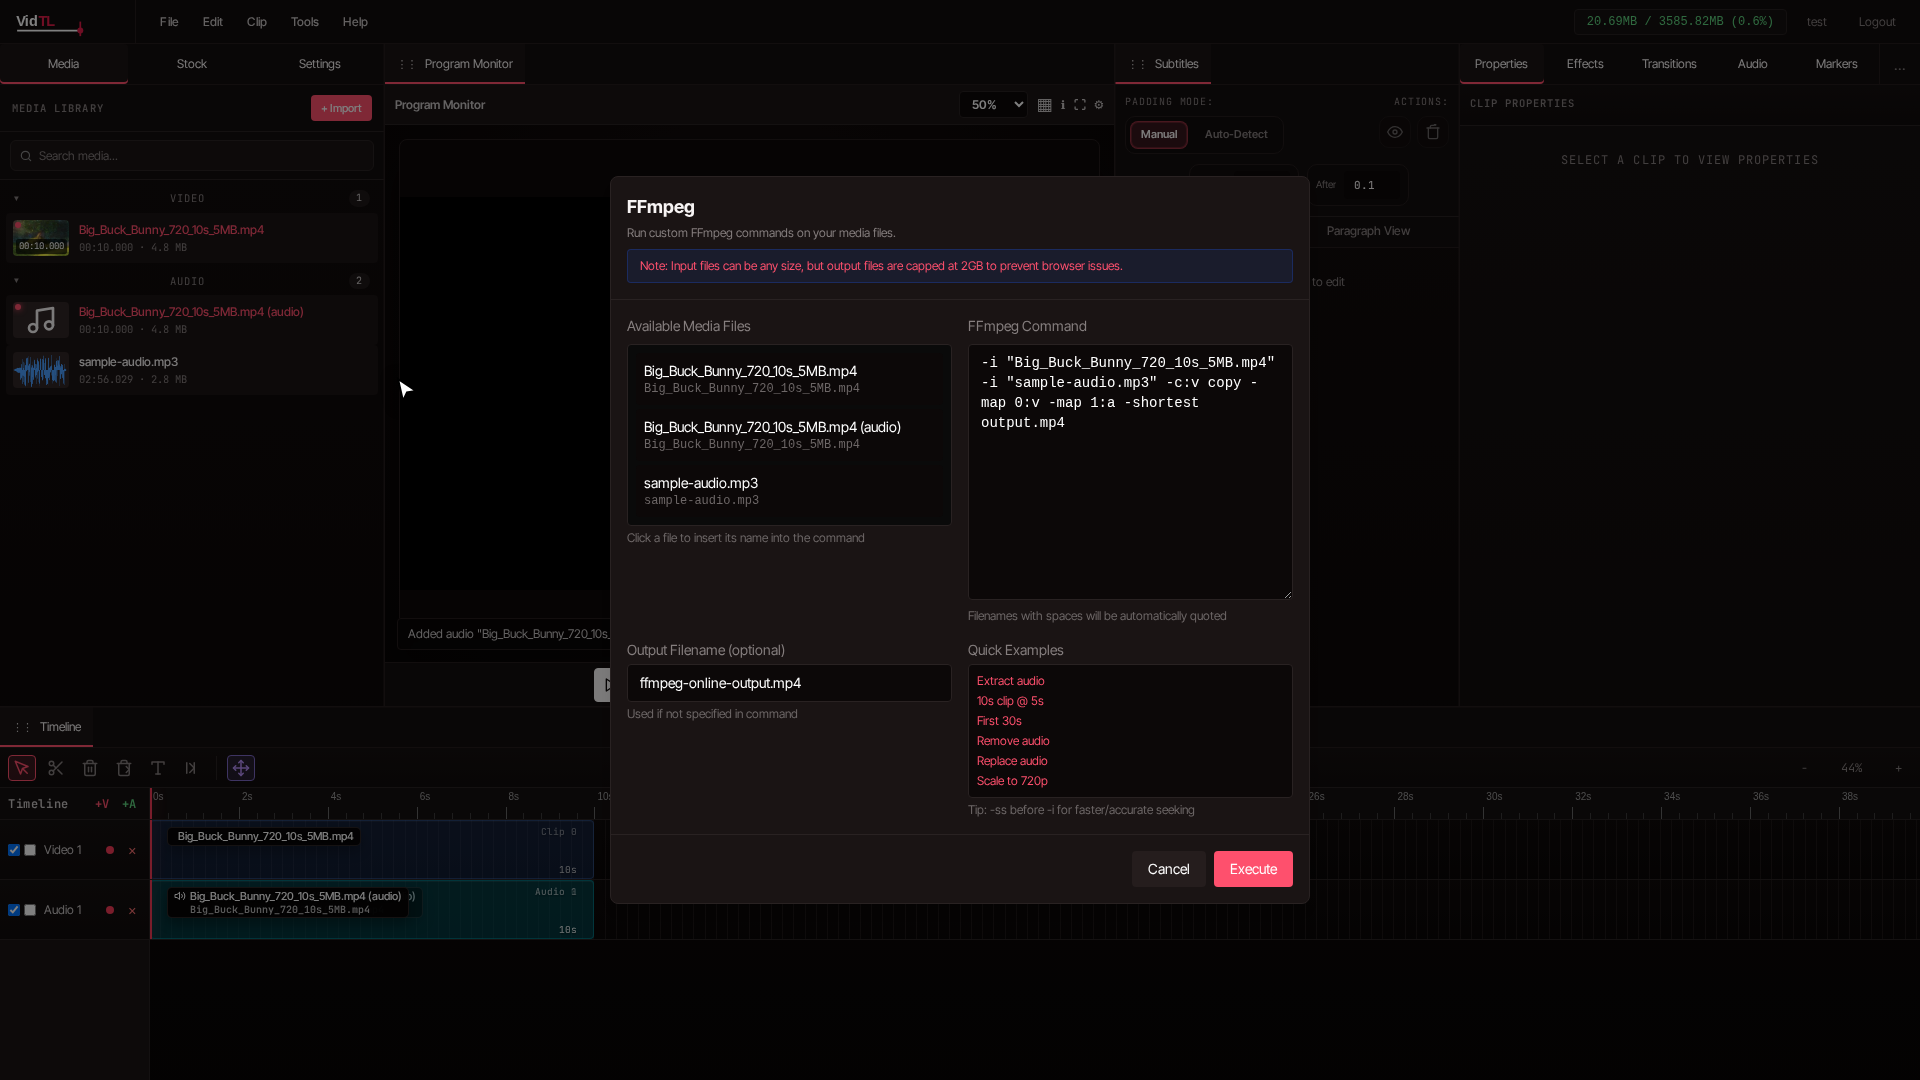
Open the FFmpeg tool from the Tools menu
Go to the top menu and click Tools, then select FFmpeg. A dialog opens with two key areas: Available Media Files on the left and FFmpeg Command on the right. This layout makes it easy to build commands without typing everything manually.
Build your first command with Quick Examples
Inside the FFmpeg dialog, start with one of the Quick Examples. This is the easiest way to avoid command mistakes. Click an example like Extract audio or Scale to 720p, then replace filenames to match your media. You can click a file from Available Media Files to insert its name into the command field.
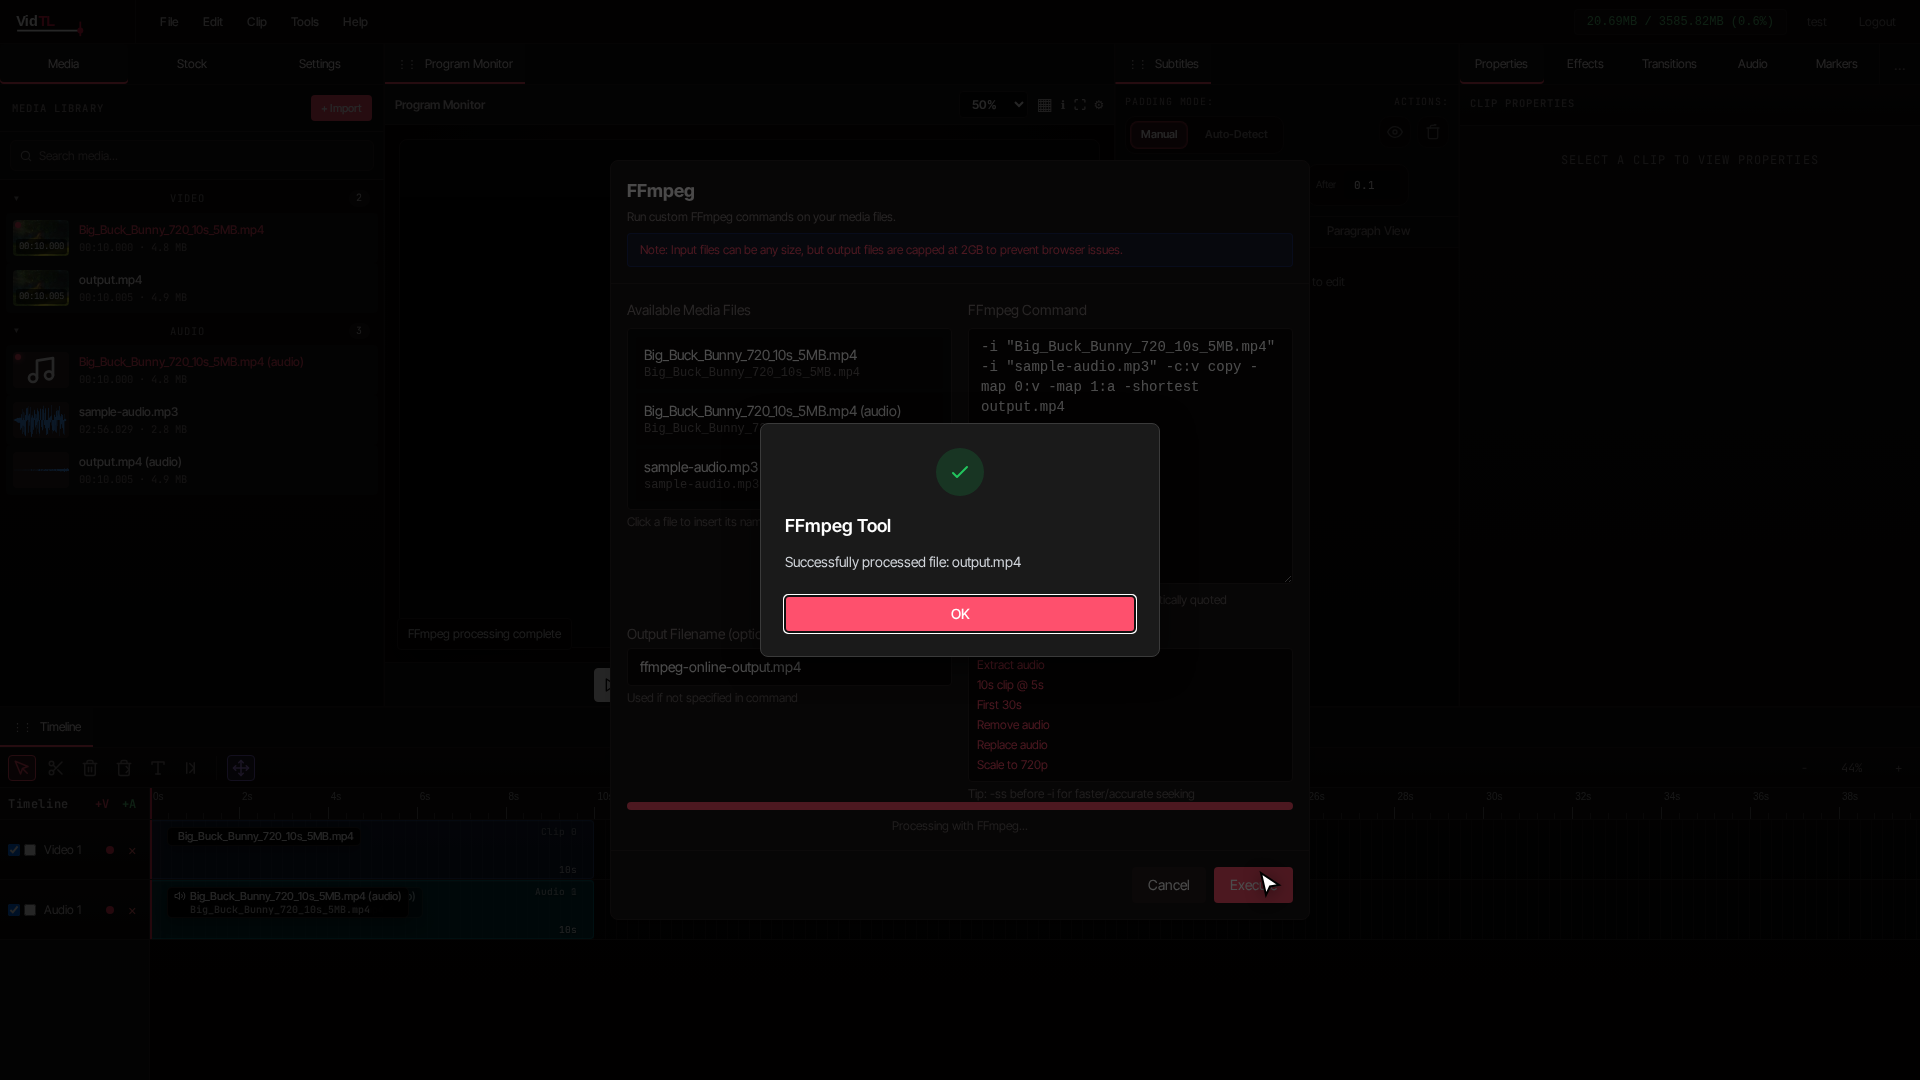
Set an output filename and run Execute
Give each run a clear output name. Use names like intro-cut.mp4, voice-clean.m4a, or short-vertical.mp4 so you can track versions easily. Then click Execute. You will see progress as the command runs.
If the result is not what you want, adjust your command and run again.
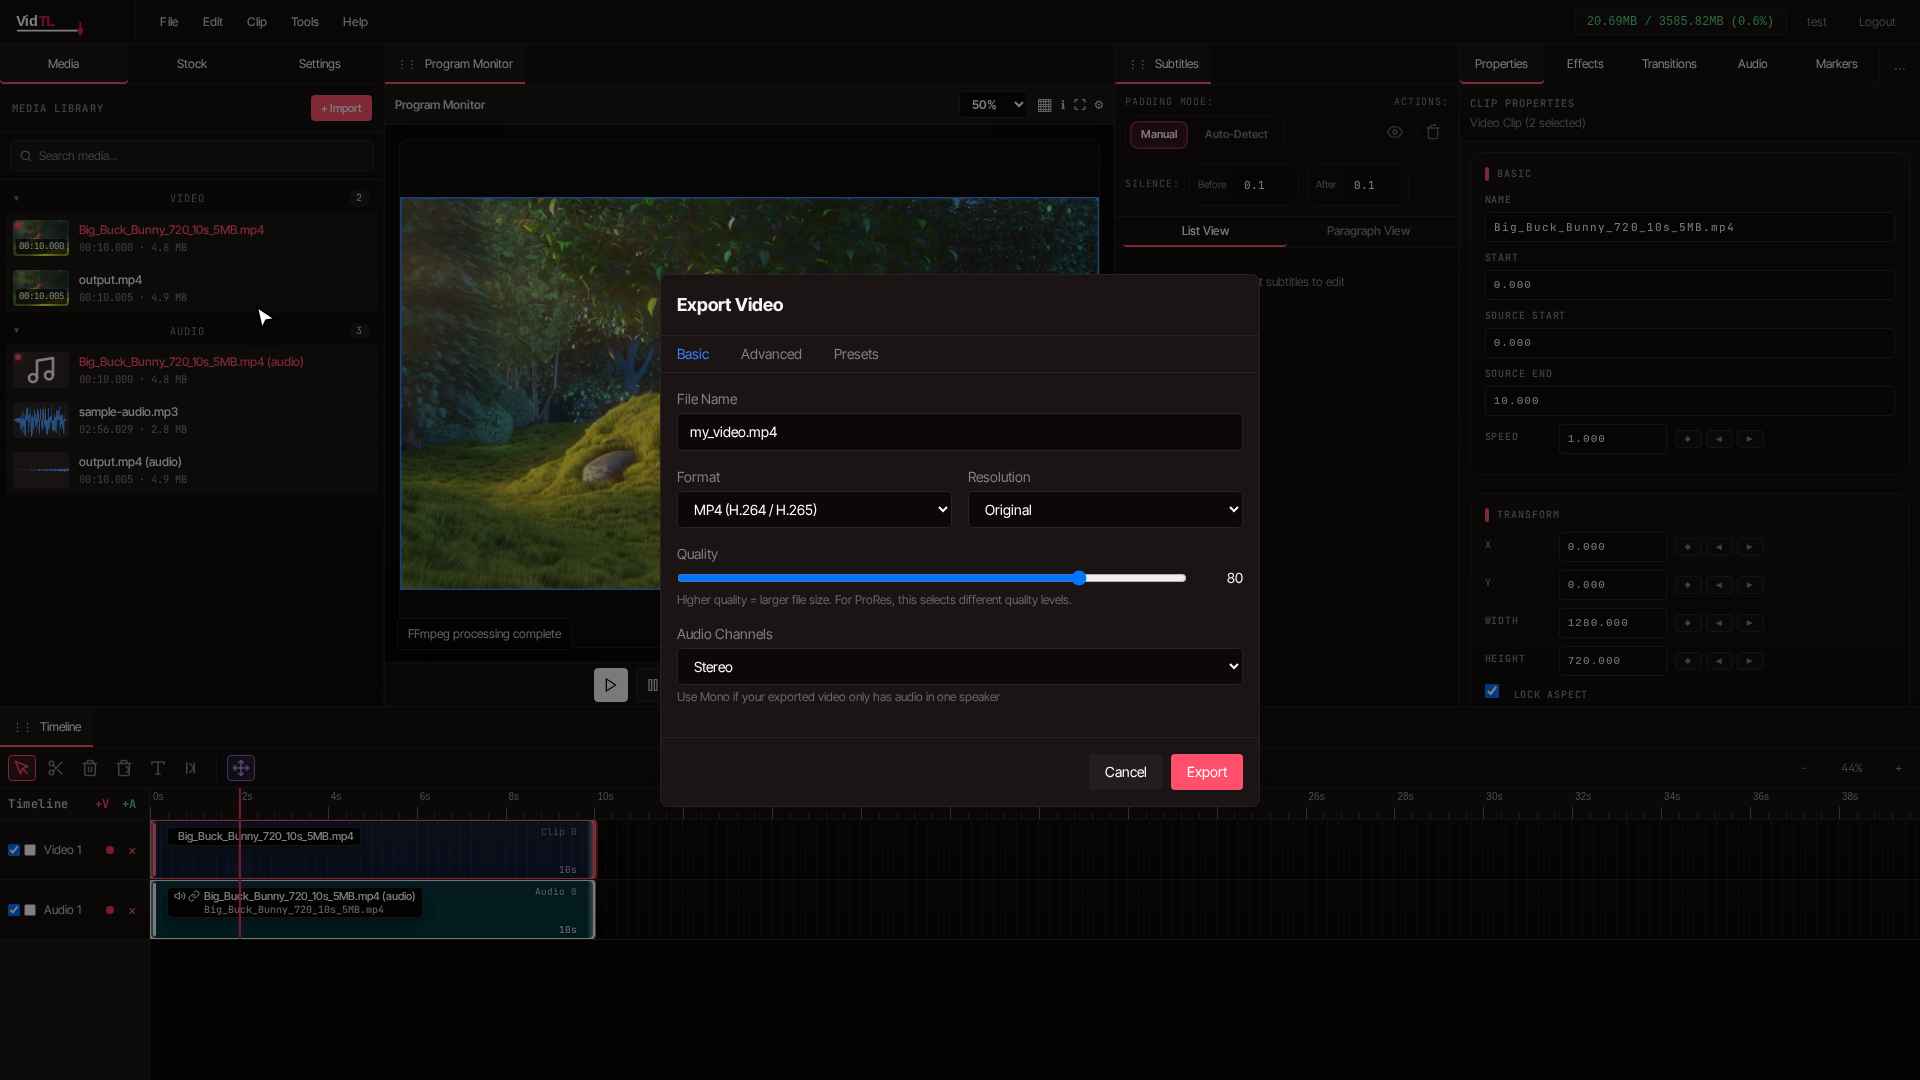
Review the result and continue editing if needed
After processing, bring the new file back into your project flow. You can preview in the Program Monitor and place results on the timeline for quick checks. If you need final delivery files, open File and choose Export Video when your FFmpeg prep is done.
Action takeaway: treat FFmpeg as your fast prep station, then finish presentation edits on the timeline and export with confidence.
Command reference
FFmpeg command ideas that go beyond normal editing tools
These command patterns are useful for batch jobs, automation, extraction, analysis, and media workflows that are much faster from the command line. Copy one, update filenames, and run. If your source names include spaces, keep quotation marks around file names.
| Goal | Command Pattern | When to use it |
|---|---|---|
| Screenshot every second | -i input.mp4 -vf fps=1 frames/frame_%04d.jpg | Create review thumbnails, contact sheets, datasets, or visual logs from a video. |
| Make a contact sheet | -i input.mp4 -vf "fps=1/10,scale=320:-1,tile=5x4" contact-sheet.jpg | Summarize a long video as one image with snapshots every 10 seconds. |
| Detect scene changes | -i input.mp4 -vf "select='gt(scene,0.35)',showinfo" -f null - | Find cut points automatically before clipping highlights or making chapters. |
| Extract scene thumbnails | -i input.mp4 -vf "select='gt(scene,0.35)',scale=640:-1" -vsync vfr scenes/scene_%04d.jpg | Save one image per major visual change instead of manually scrubbing the timeline. |
| Create HLS stream files | -i input.mp4 -c:v h264 -c:a aac -f hls -hls_time 6 -hls_playlist_type vod stream/index.m3u8 | Turn one video into web-ready streaming segments for players that use HLS. |
| Generate waveform image | -i audio.mp3 -filter_complex "showwavespic=s=1200x300" waveform.png | Create a visual audio waveform for editing notes, podcast pages, or previews. |
| Find silence sections | -i input.mp4 -af silencedetect=noise=-35dB:d=0.5 -f null - | Locate dead air, pauses, or gaps in interviews and screen recordings. |
| Normalize loudness | -i input.mp4 -af loudnorm=I=-16:TP=-1.5:LRA=11 -c:v copy normalized.mp4 | Make dialogue, podcasts, and lessons more consistent without manually keyframing volume. |
| Burn in subtitles | -i input.mp4 -vf "subtitles=captions.srt" -c:a copy subtitled.mp4 | Create a video with permanent captions for platforms that do not load sidecar subtitle files. |
| Extract embedded subtitles | -i input.mkv -map 0:s:0 captions.srt | Pull subtitle tracks out of a media file for translation, editing, or reuse. |
| Create animated GIF | -ss 00:00:05 -i input.mp4 -t 3 -vf "fps=12,scale=480:-1:flags=lanczos" clip.gif | Make quick looping previews from a specific moment in a video. |
| Stack videos side by side | -i left.mp4 -i right.mp4 -filter_complex hstack=inputs=2 comparison.mp4 | Compare before/after exports, camera angles, edits, or compression results. |
| Picture-in-picture | -i screen.mp4 -i camera.mp4 -filter_complex "[1:v]scale=320:-1[pip];[0:v][pip]overlay=W-w-24:H-h-24" output.mp4 | Automate webcam-over-screen layouts for tutorials, demos, and courses. |
| Blur a region | -i input.mp4 -filter_complex "[0:v]crop=300:120:40:40,boxblur=12[blur];[0:v][blur]overlay=40:40" blurred.mp4 | Hide names, emails, dashboards, license plates, or private UI areas. |
| Speed up silent screencast | -i input.mp4 -filter:v "setpts=0.5*PTS" -an fast.mp4 | Turn long silent screen recordings into quicker process videos. |
| Inspect media metadata | -i input.mp4 -hide_banner | Check codecs, streams, resolution, frame rate, duration, and audio layout before processing. |
Mistakes that slow beginners down
-
×
Using unclear filenames: It gets confusing after two or three exports. Name outputs by purpose.
-
×
Changing too many things at once: Test one adjustment per run so you know what worked.
-
×
Skipping preview checks: Always inspect the result in the Program Monitor before final export.
-
×
Starting with complex tasks: Begin with trim or extract audio, then move to bigger edits.
-
×
Ignoring final platform needs: Decide destination first, then choose dimensions and file size accordingly.
Habits that make this workflow smooth
-
✓
Save command snippets: Keep your top five in a note so you can reuse them instantly.
-
✓
Create output versions: Use names like
v1,v2, etc. -
✓
Batch simple tasks: Do all trims first, then all resize jobs to stay focused.
-
✓
Match export to destination: Smaller outputs for messaging apps, higher quality for YouTube uploads.
-
✓
Keep originals safe: Your source media should stay unchanged so revisions are easy.
FAQ: using FFmpeg online without installing
1) Can I really use FFmpeg online without installing anything?
Yes. In VidTL, you can run FFmpeg tasks directly from the browser using the built-in tool in the Tools menu. You import media, run commands, and export results without setting up desktop software.
2) Is this good enough for real client work?
For many everyday jobs, yes. If your project is deadline-driven and you need fast revisions, this setup is very practical.
3) What is the easiest first command to try?
Start with a short clip command or extract audio command from Quick Examples. Both are low risk, easy to verify, and help you understand how inputs and outputs are named.
4) What if my output does not look or sound right?
Run a second pass with a small adjustment. Change one part only, such as duration, output name, or resize target. Then preview in the Program Monitor. This simple testing method solves most quality issues quickly.
5) How do I speed up my workflow after I learn the basics?
Build a personal mini library of commands for your recurring tasks, keep consistent file names, and process similar jobs in batches. After that, opening the FFmpeg dialog and running tasks becomes a two-minute routine.
Conclusion
If your goal is to use FFmpeg online without installing anything, VidTL gives you a clean way to do it inside one workspace. You import files, run a command in the FFmpeg dialog, check the result, and export what you need. No setup maze, no extra desktop tools, no unnecessary complexity.
The key is to start simple, name outputs clearly, and reuse proven command patterns. Do that for a week, and you will handle common video tasks faster than most people using bulky software stacks. The best part is that your process stays lightweight while your results still look professional.