How to Automatically Remove Silence from Podcast Video - Online & For Free
This guide walks you through removing pauses, dead air, and silence from a podcast video in your browser, using a free tool that detects quiet sections and cuts them out.
Podcast recordings usually contain long stretches of silence between takes, awkward pauses mid-conversation, and dead air while a speaker gathers their thoughts. Scrubbing through hours of footage to find and cut these moments by hand is slow.
You can skip the manual work. The tool below analyzes your audio and removes silent sections automatically, with no software to install.
Why remove silence from podcast videos
A 60-minute podcast with silence can trim down to 40-45 minutes of actual content. The tighter pacing holds attention, and shorter videos perform better on platforms where watch time drives reach, such as YouTube, TikTok, and Instagram.
Step-by-step guide to remove silence automatically
1. Open the video editor
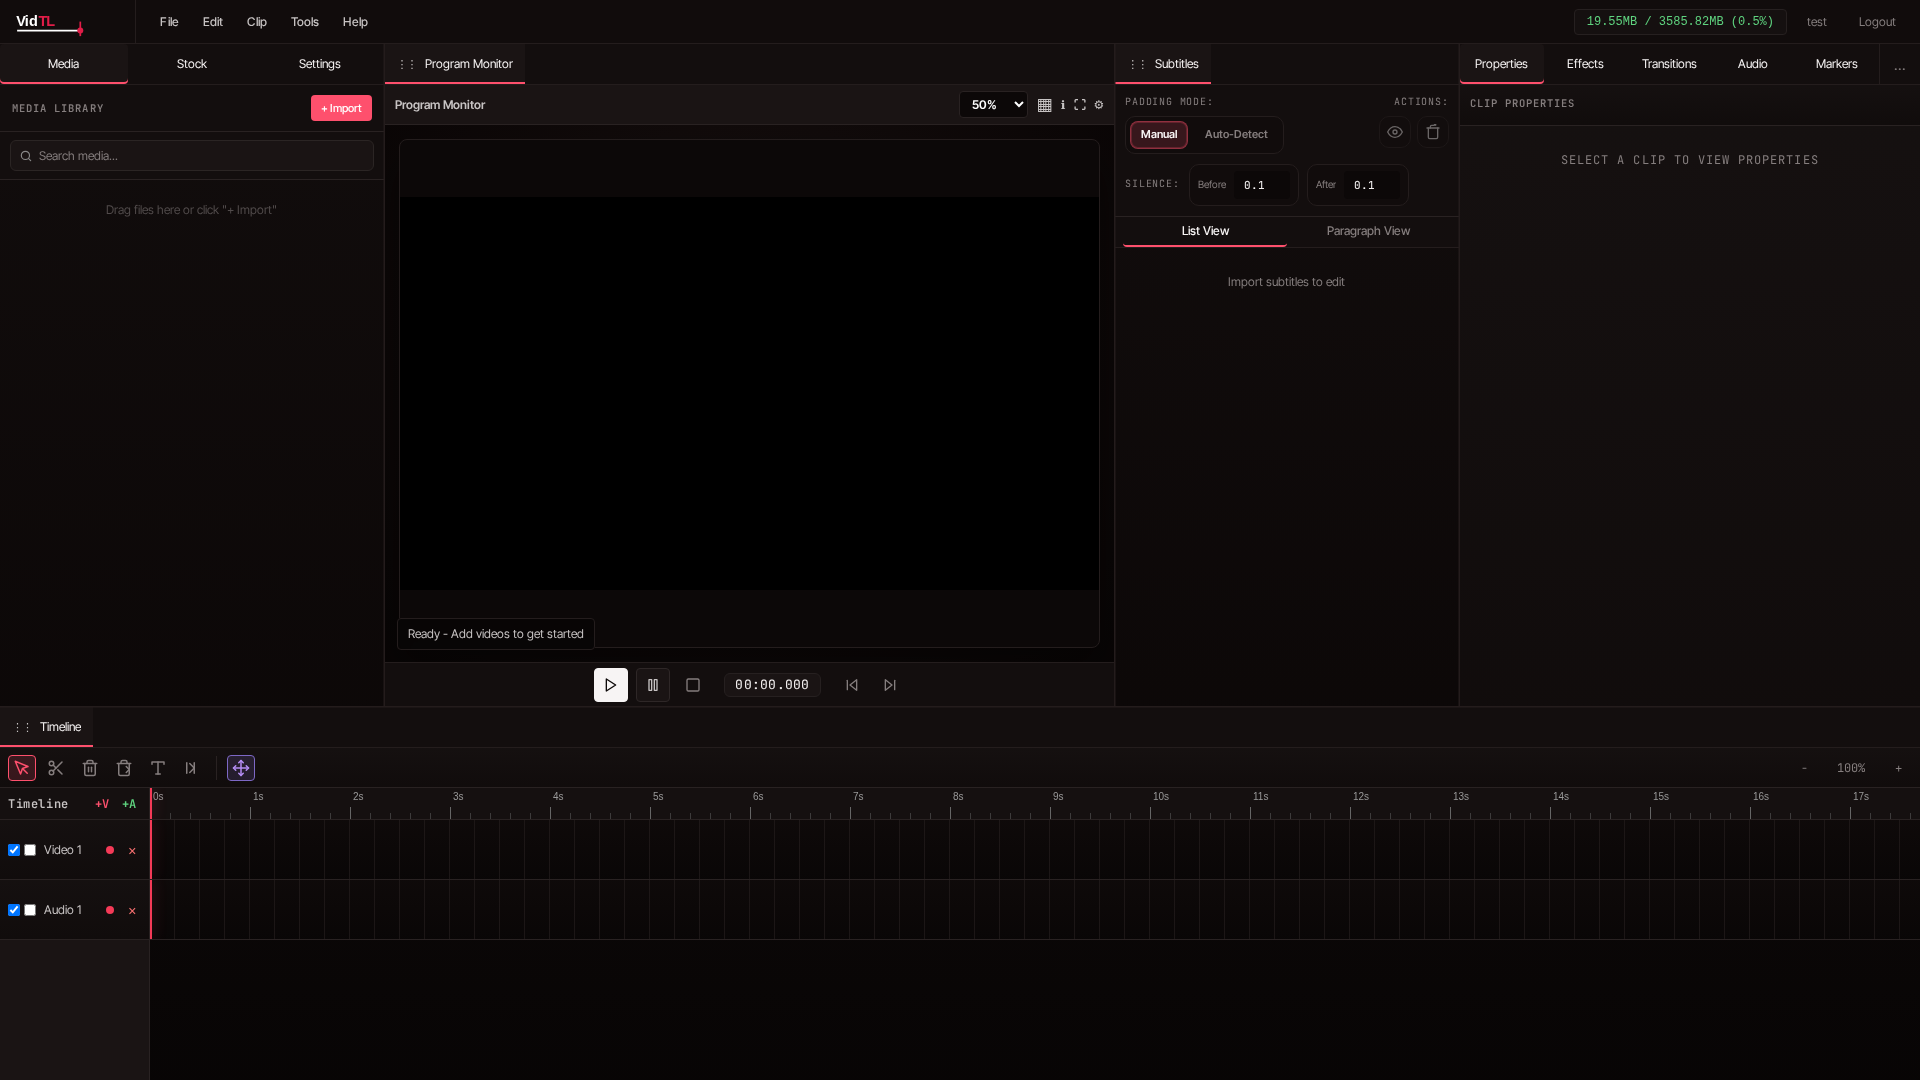
Visit VidTL's online video editor. It loads in your browser with no download. You will see a media library on the left, a preview window in the center, and a timeline at the bottom.
2. Import your podcast video
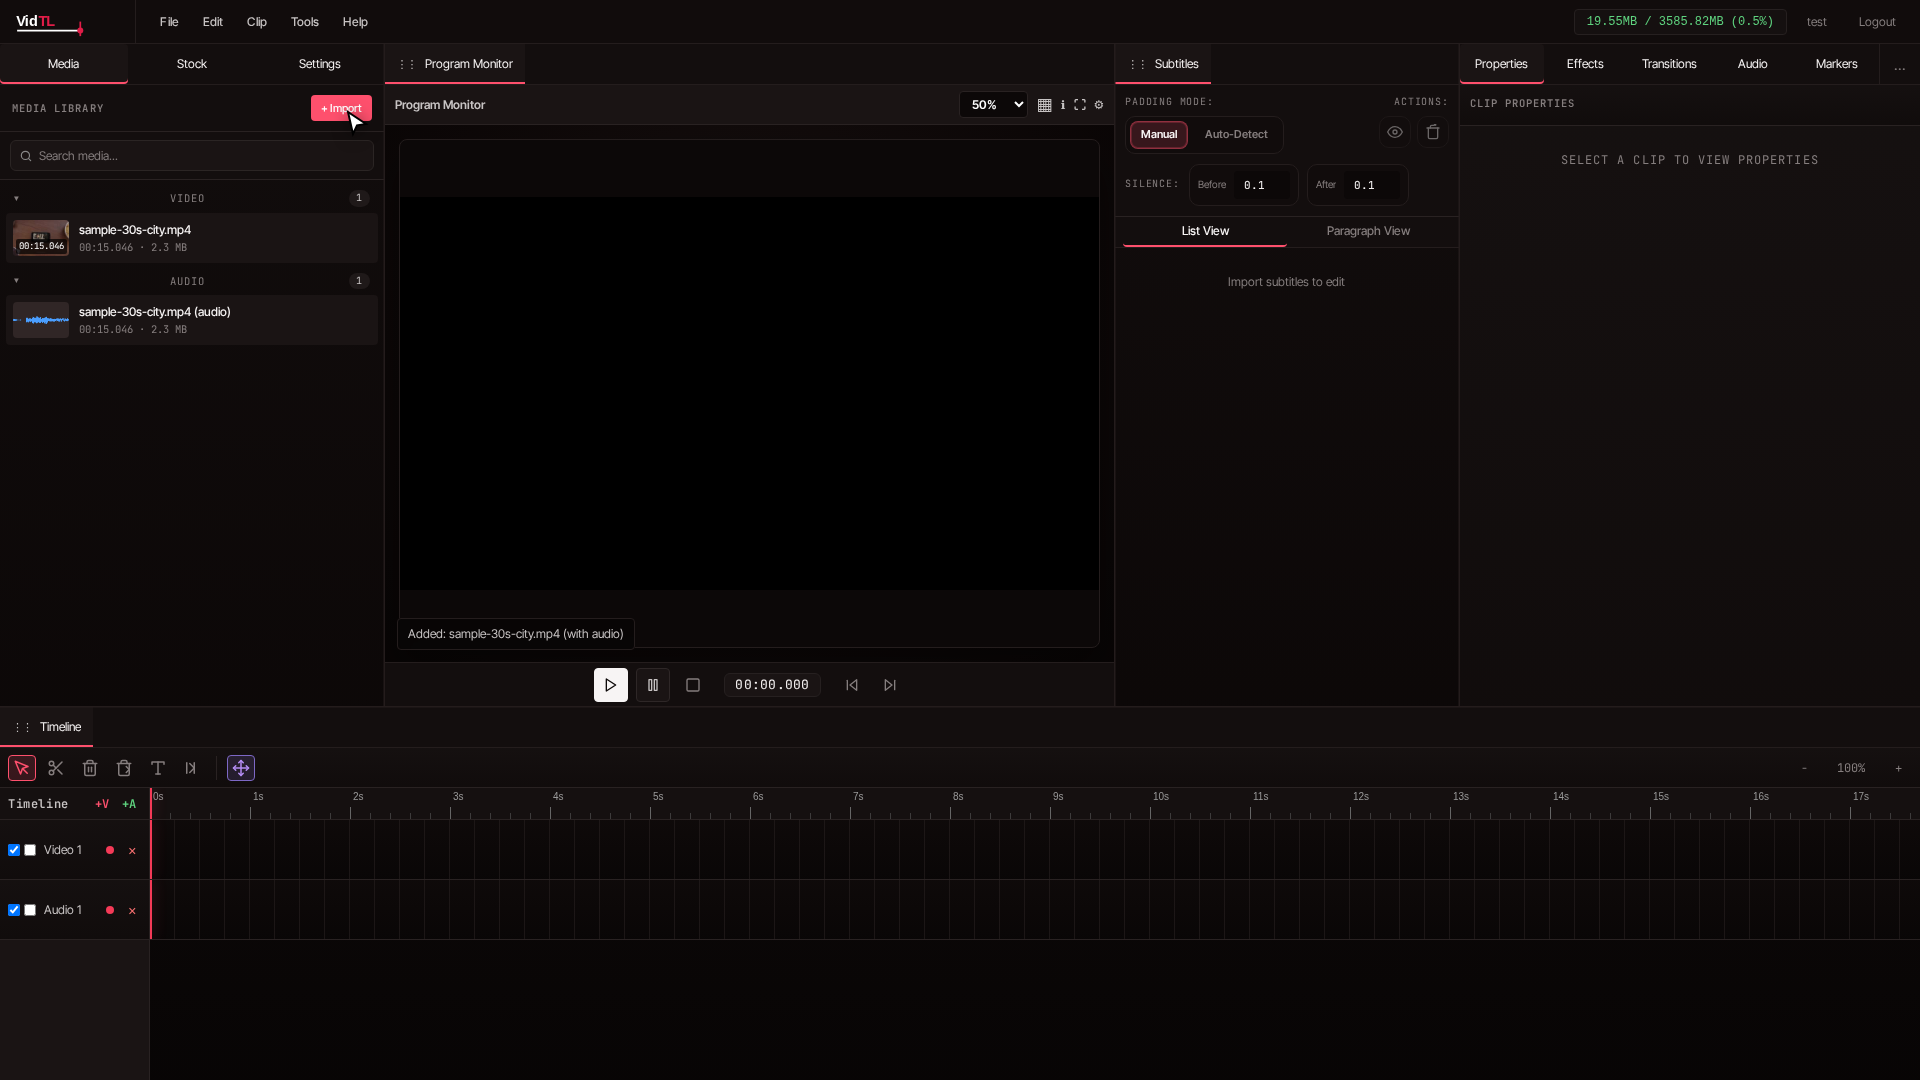
Click the **Import Media** button in the media library panel, or use the **File** menu at the top and select **Import Media**. Choose your podcast video file from your computer. The editor supports MP4, MOV, WebM, and most common video formats. Once loaded, your video appears as a thumbnail in the media library.
3. Add video to timeline
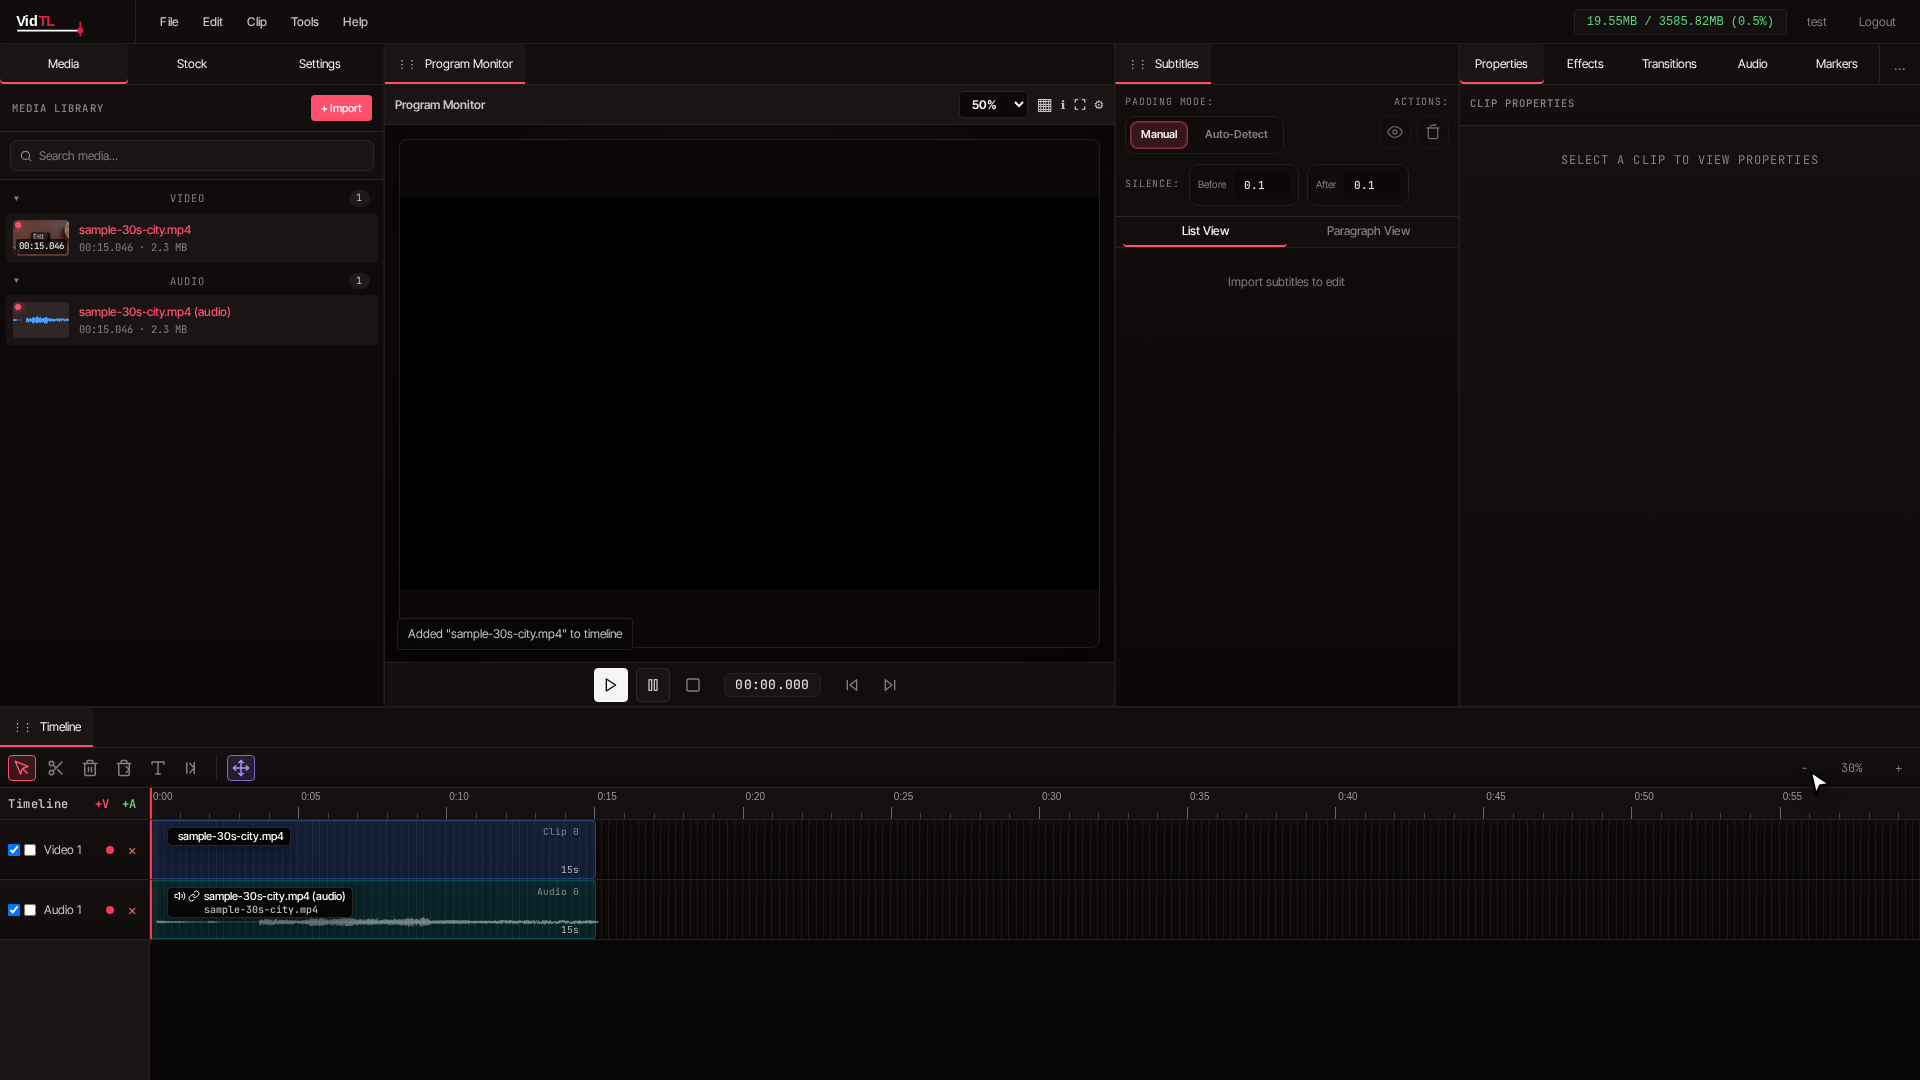
Drag the video from the media library onto the timeline at the bottom of the screen, or double-click the video to add it. The clip appears as a bar on the timeline with an audio waveform below it, showing where sound is present in your recording.
4. Open the Remove Silence tool
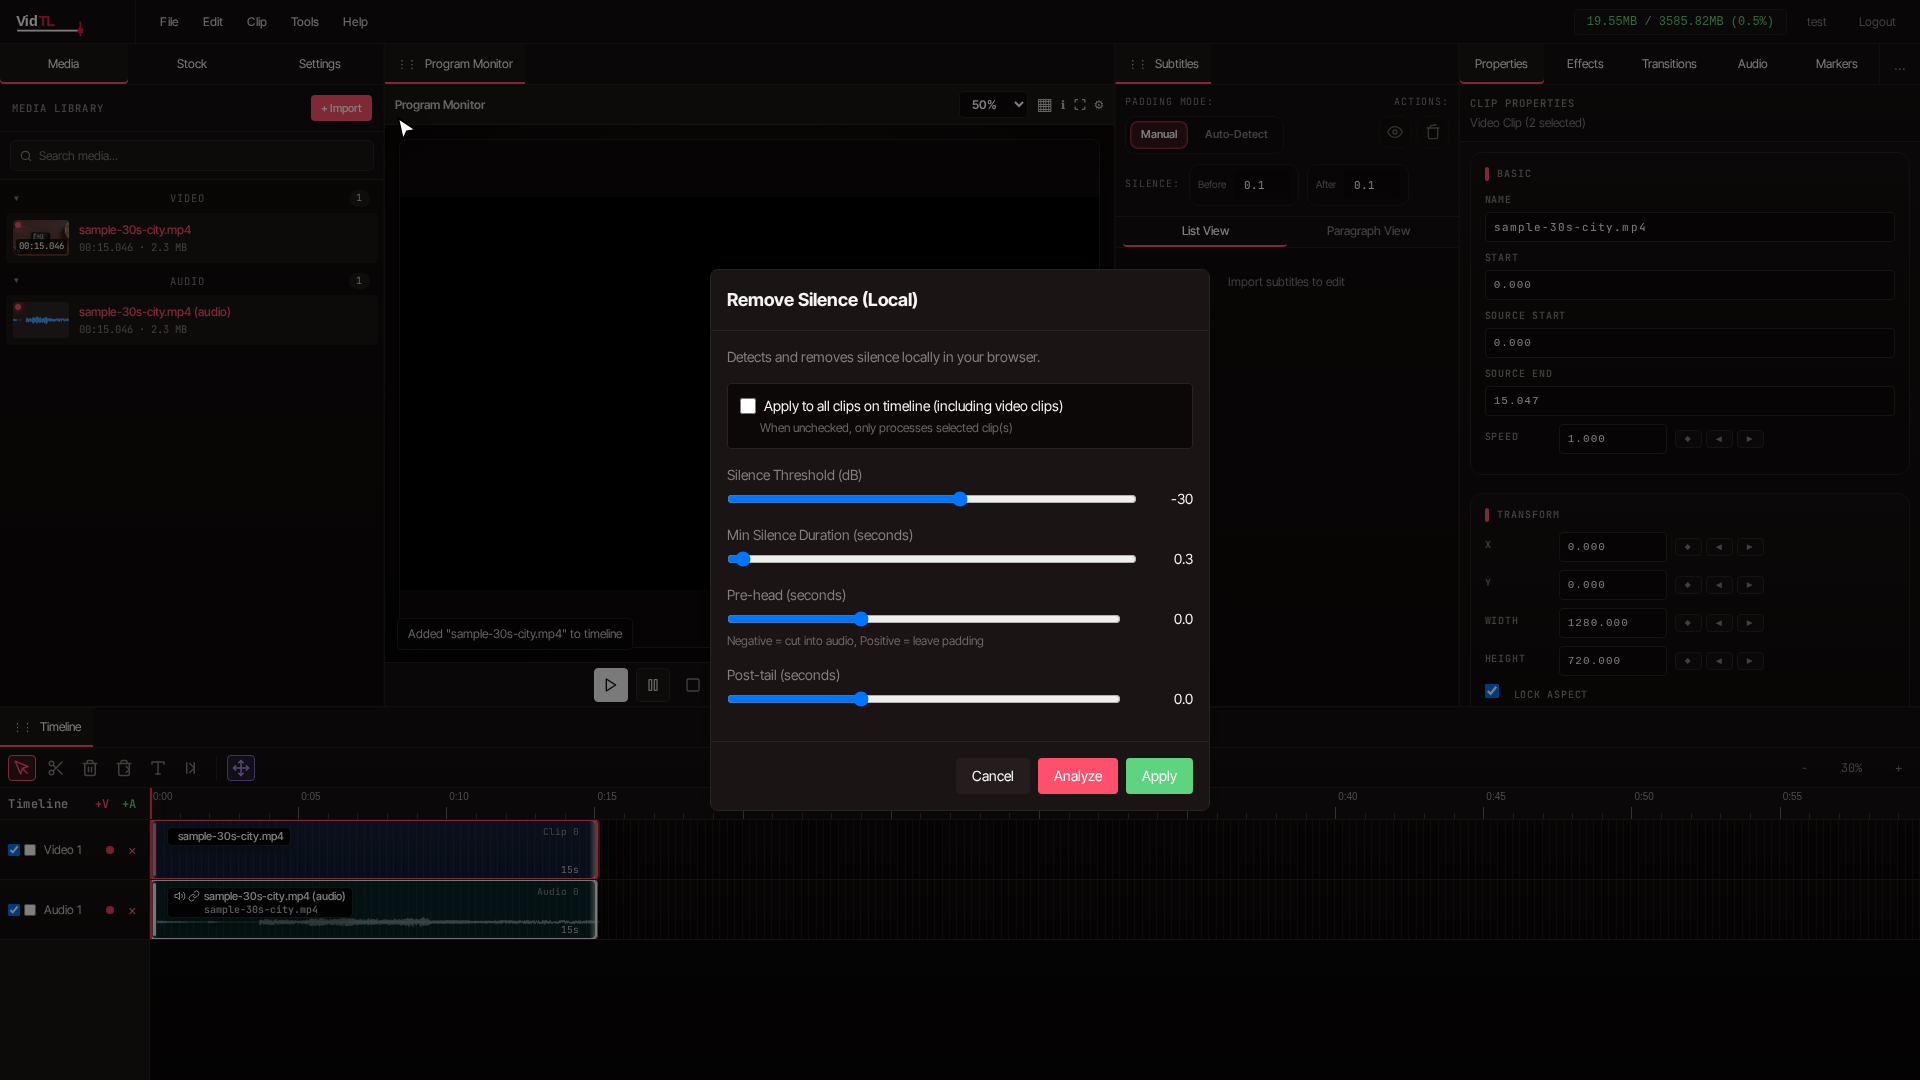
Click the **Tools** menu in the top menu bar. A dropdown appears with several options. Select **Remove Silence** from the list. This opens a dialog with settings that control how silence detection works.
5. Configure silence detection settings
The Remove Silence dialog gives you control over what counts as silence. Two settings matter most:
- Silence Threshold (dB) sets how quiet audio must be before it is treated as silence. The default of -40 dB works for most podcasts. If your recording has background noise, lower it to -45 dB or -50 dB to catch only true silence.
- Minimum Silence Duration sets how long a quiet section must be before it is removed. The default 0.5 seconds keeps natural pauses between words while cutting longer silences. For interview-style podcasts with quick back-and-forth, try 0.3 seconds. For solo podcasts, 0.7 to 1.0 seconds works better.
A checkbox labeled **Apply to all clips on timeline** processes every video and audio clip at once, useful if you have multiple camera angles or separate audio tracks.
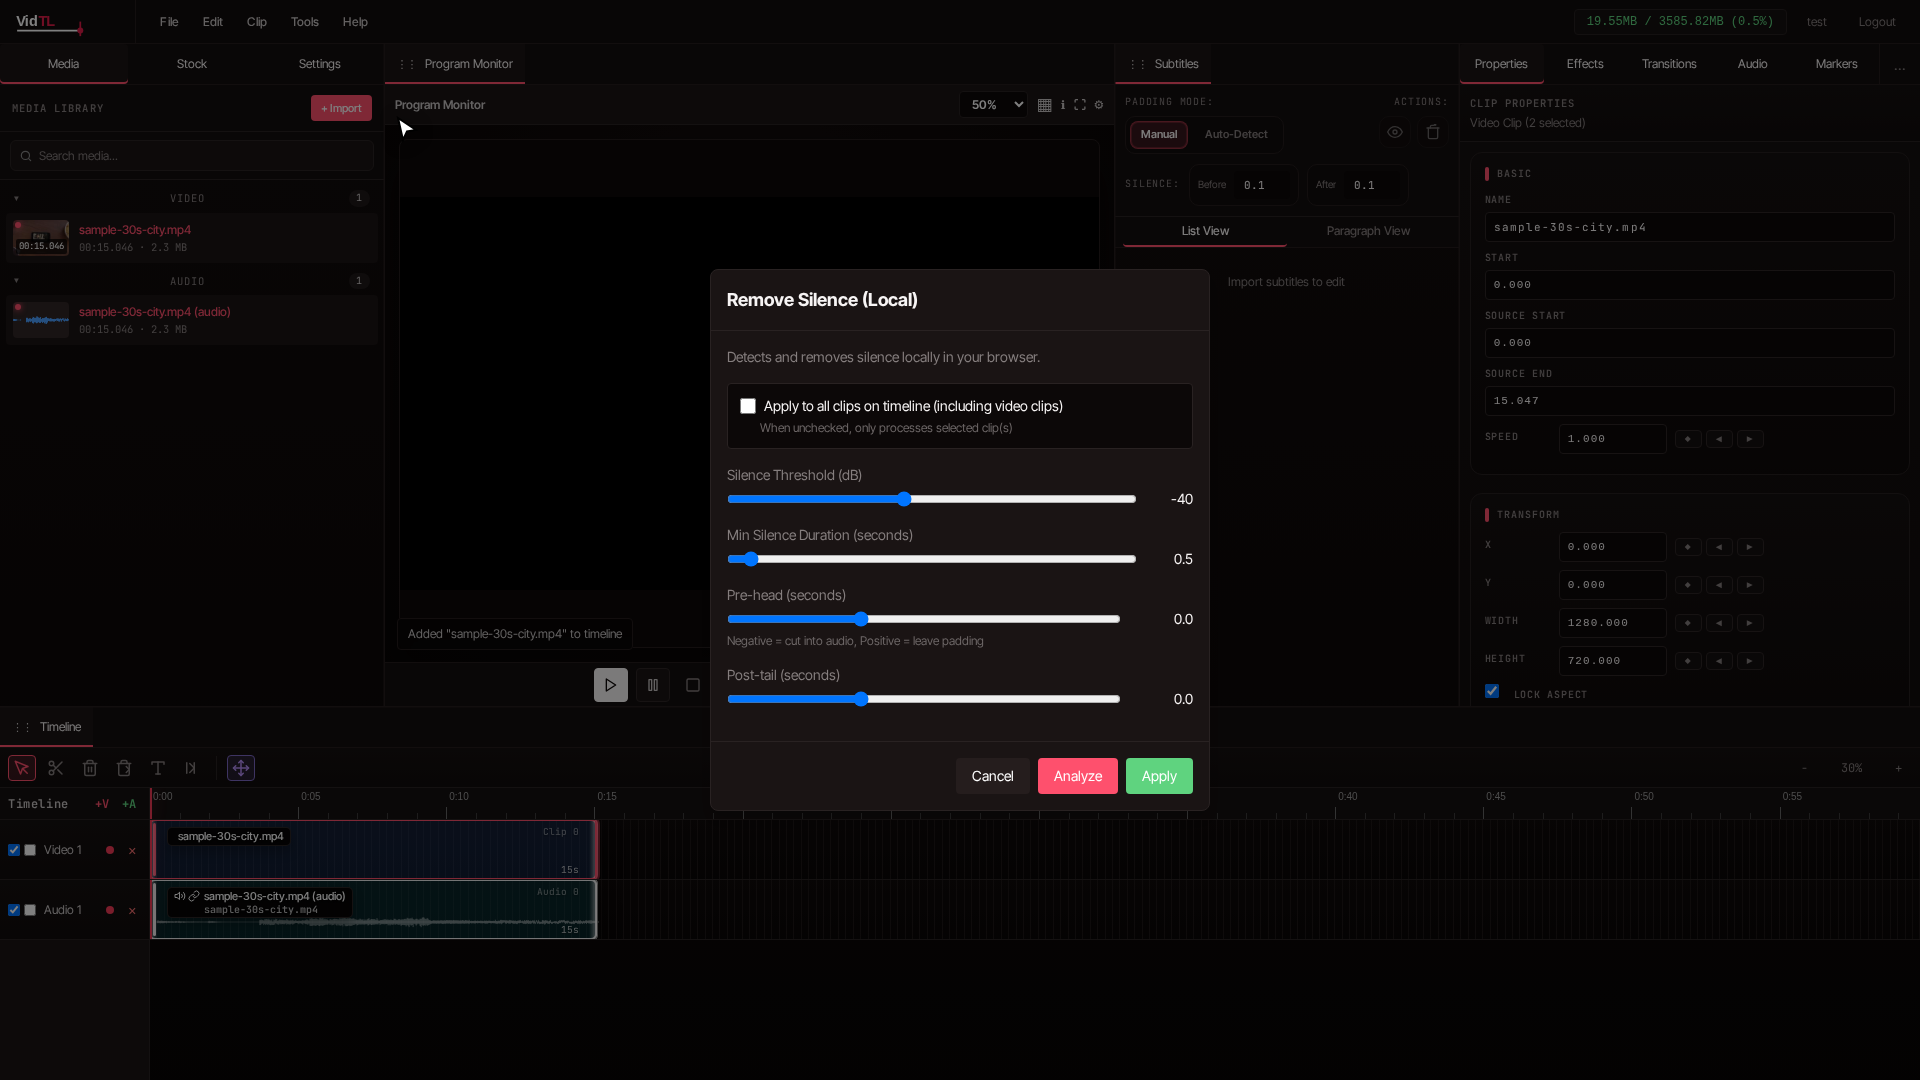
6. Analyze your video
Click the **Analyze** button. The tool scans your video's audio track and identifies silent sections based on your settings.
After a few seconds, a preview summary appears showing what will be removed: the number of silence regions detected, the total time that will be cut, and how many clips are affected. Red highlights mark each silent section on the timeline.
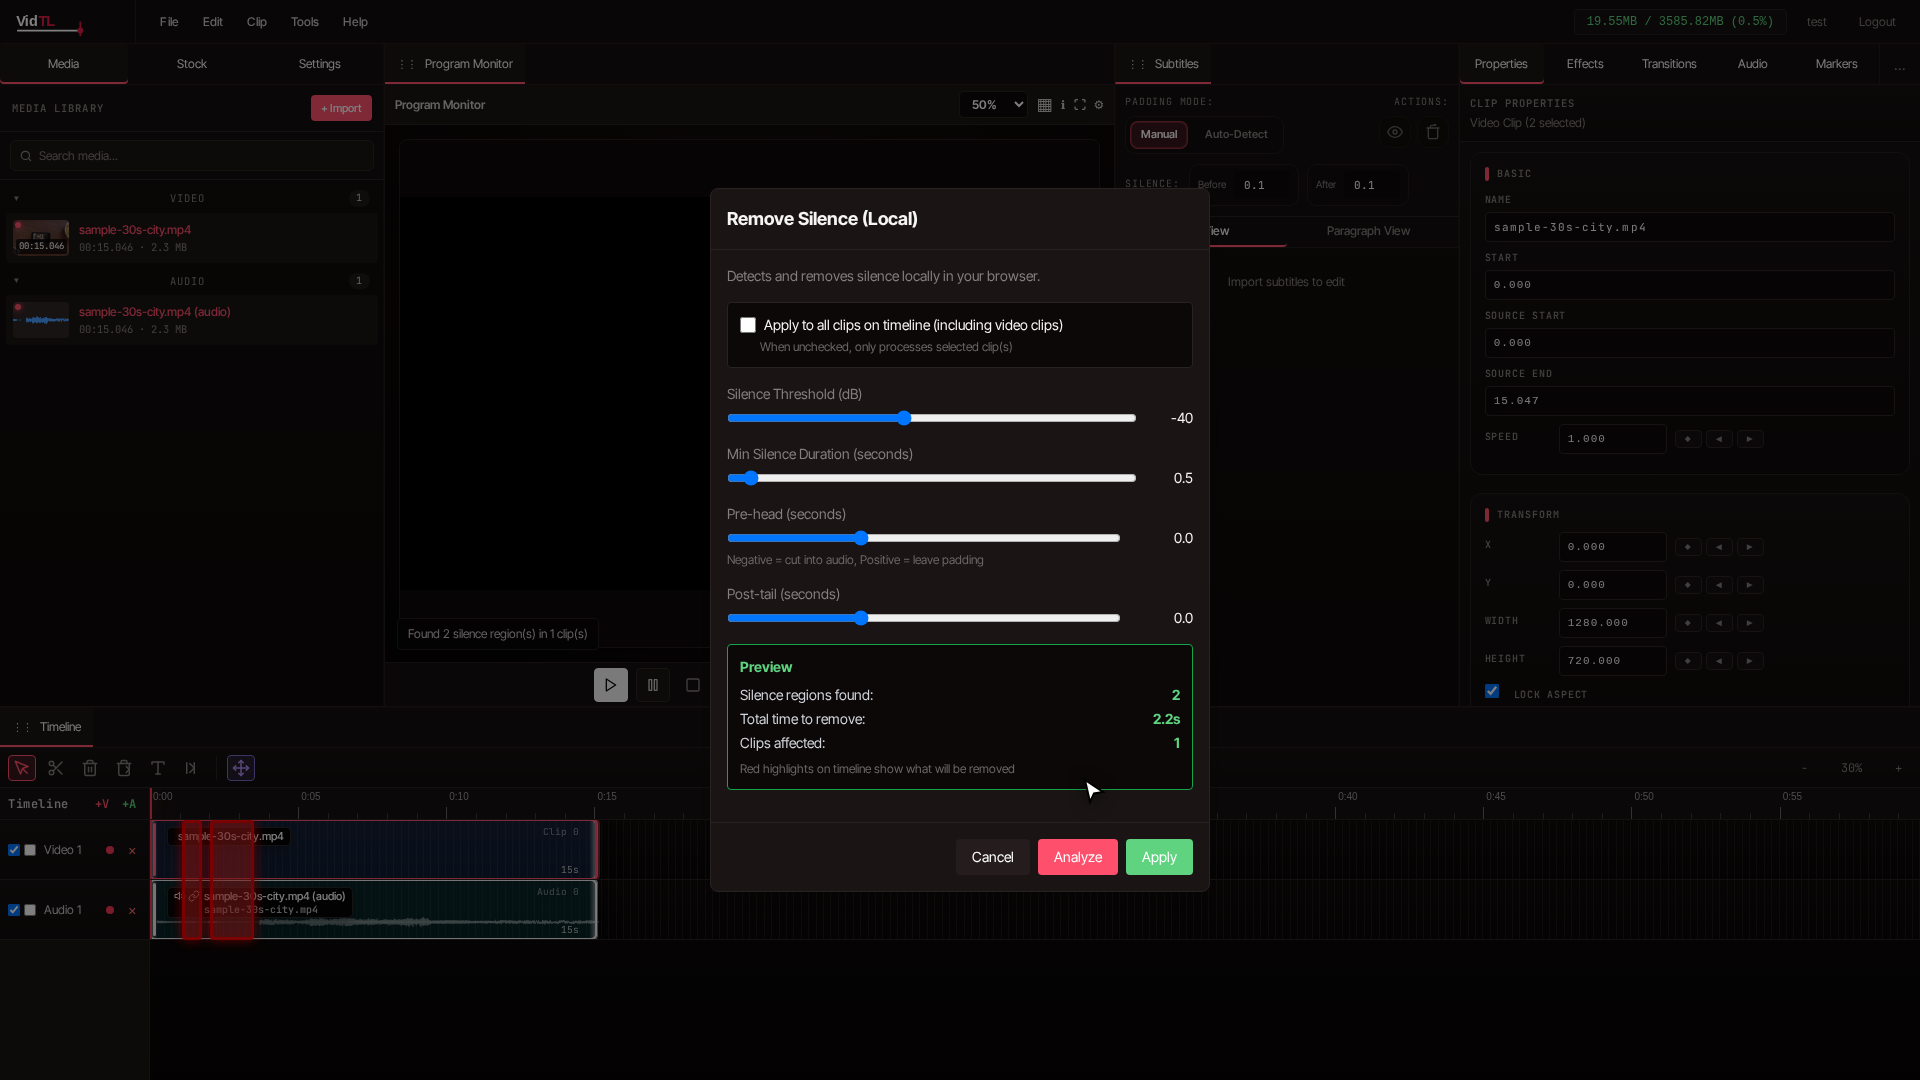
7. Review and adjust if needed
Look at the red highlights on your timeline to see what is getting cut. If too much is being removed, adjust your settings:
- Lower the threshold (to -30 dB or -35 dB) if it is catching breathing sounds or room tone you want to keep
- Increase minimum duration (to 0.8 or 1.0 seconds) if it is removing natural conversational pauses
- Decrease minimum duration (to 0.3 or 0.4 seconds) if too many awkward pauses remain
Run the analysis again with new settings until the preview looks right. You can test different configurations as many times as you like before applying.
8. Apply the silence removal
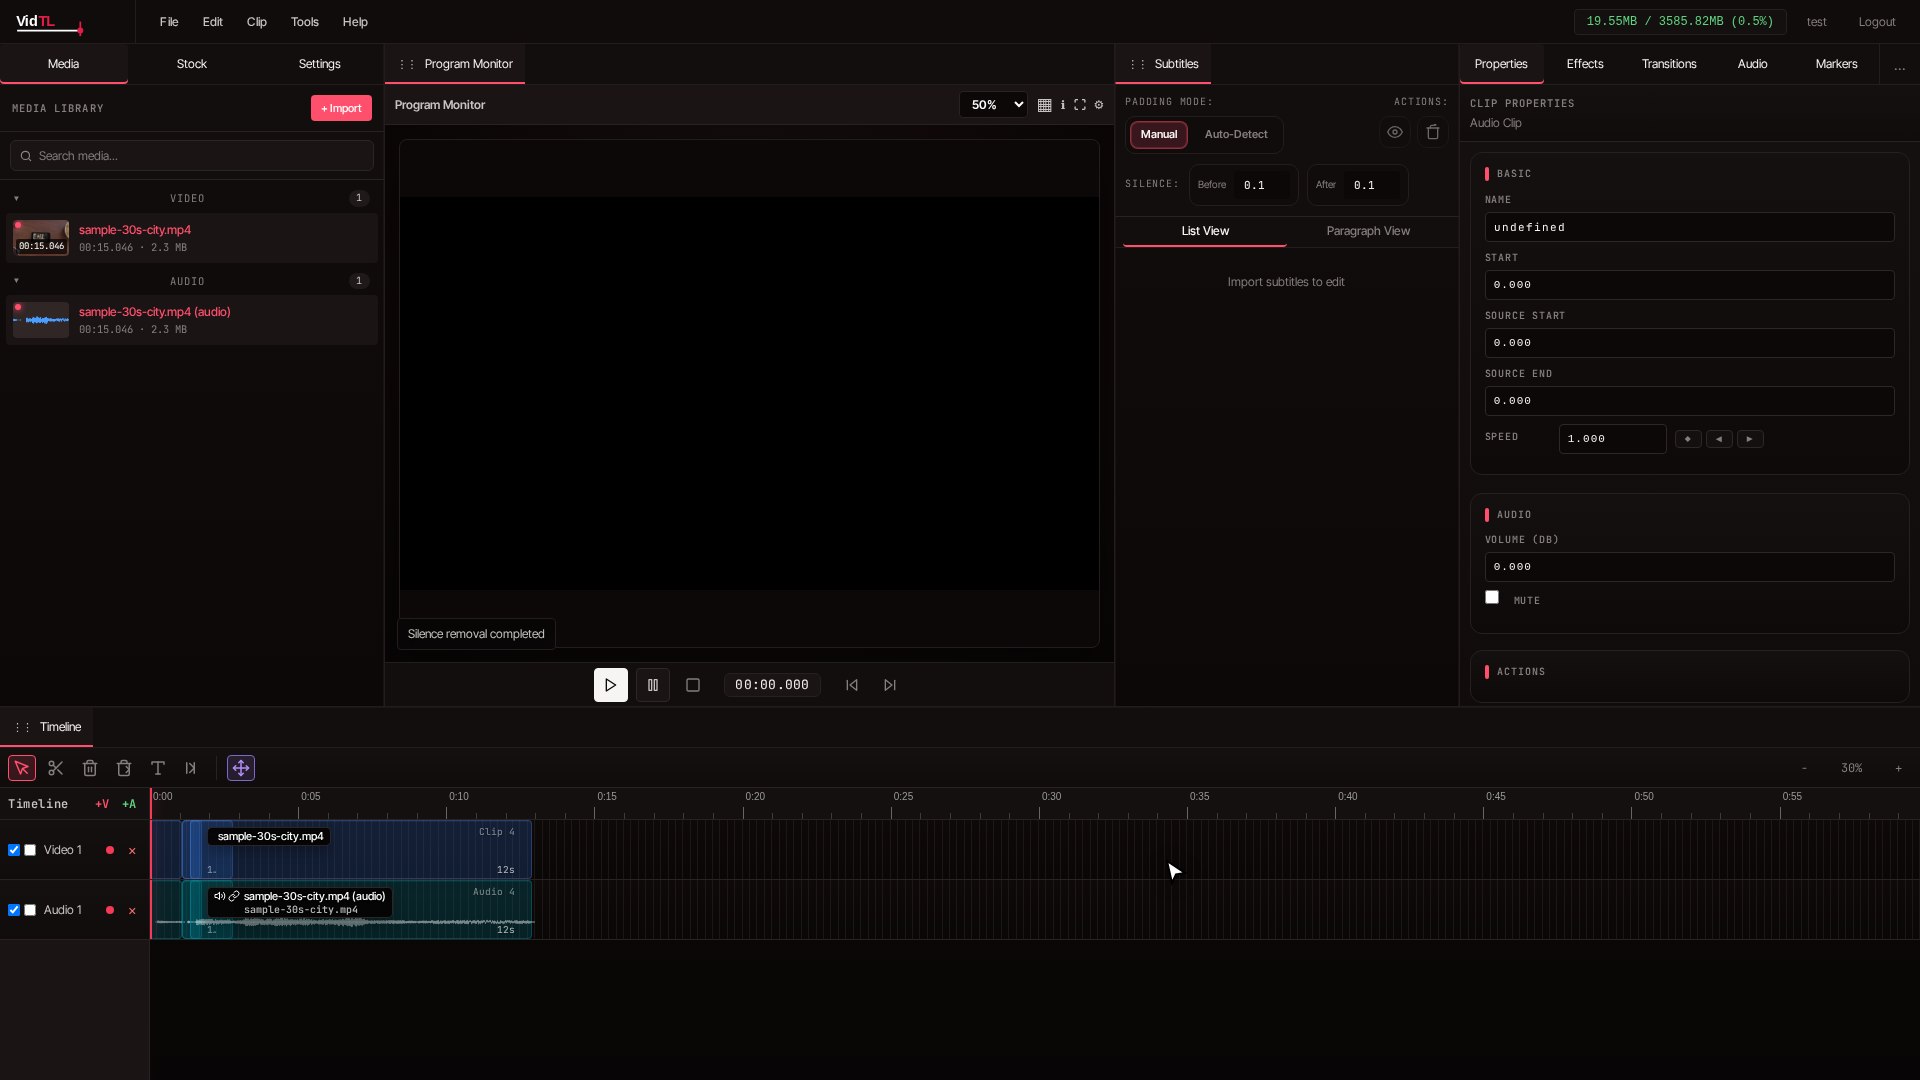
When you are happy with the preview, click the **Apply** button. The tool cuts out every silent section, splitting your clips and removing the dead air. What was one long clip becomes multiple shorter clips on the timeline with the silence gone.
The process completes in seconds. Play back your video to hear the difference. The pacing should feel tighter without the long pauses.
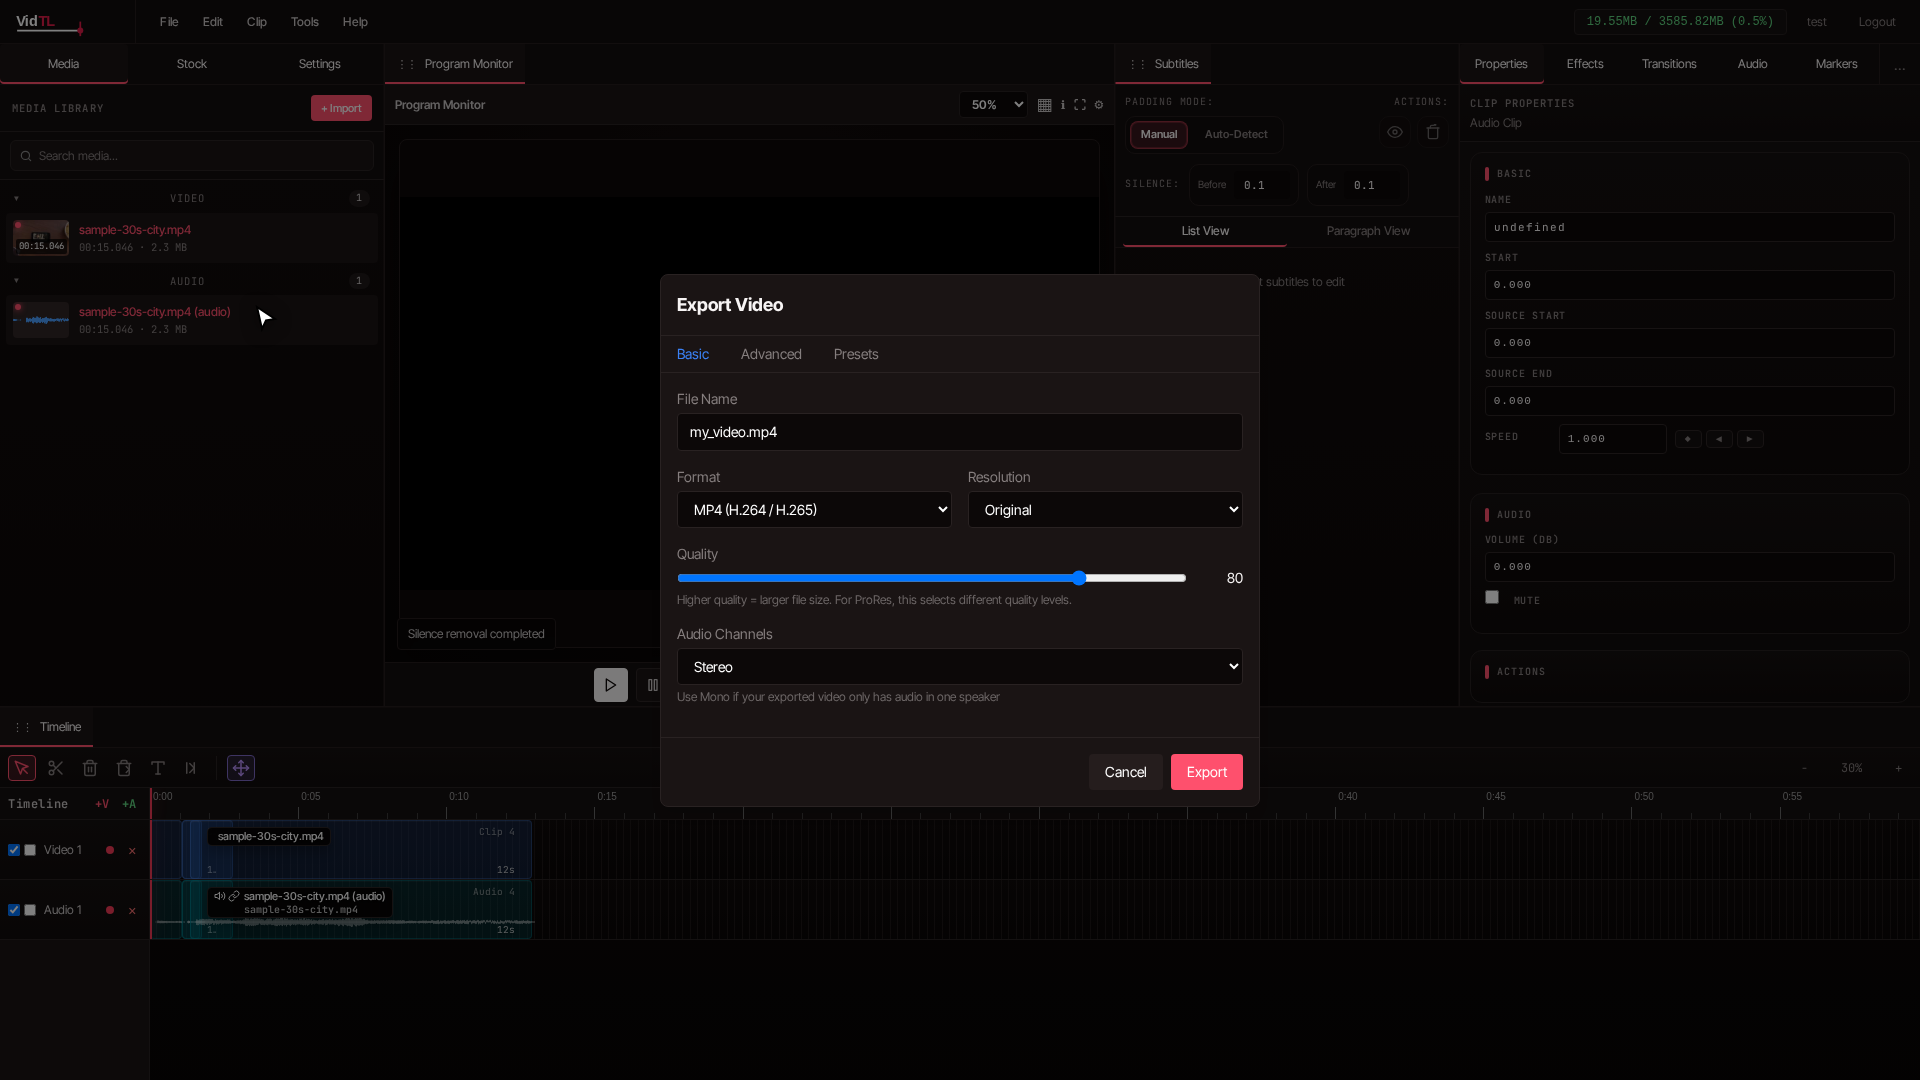
9. Export your edited video
Once satisfied with the results, export your video. Click the **File** menu and select **Export Video**. Choose your preferred quality settings and format. The editor processes your edited timeline and downloads the final video to your computer with all silence removed.
Your podcast video is now ready to upload to YouTube, Spotify, or any other platform without the awkward pauses slowing down the content.
Tips for better results
- Start conservative. Begin with higher minimum duration settings like 0.8 to 1.0 seconds to avoid cutting natural speech patterns. You can always run it again with more aggressive settings if needed.
- Test with short sections. Before processing your entire hour-long podcast, test the settings on a 5-minute section by splitting your clip and working with just that portion first.
- Record in quiet environments. Lower background noise means better silence detection. Record in quiet spaces to make the automatic detection more accurate.
- Check your export settings. After removing silence, make sure your export quality matches your source video to maintain professional quality for platforms like YouTube.
- Save your project first. Use File > Save Project before applying silence removal. This creates a backup you can return to if you want to try different settings later.
- Listen to the full edit. Always play through your edited video before exporting. Sometimes certain sections need manual adjustment that automatic detection missed.
Settings for different podcast types
| Podcast Type | Threshold (dB) | Min Duration (sec) | Why These Settings |
|---|---|---|---|
| Interview Format | -40 dB | 0.3 - 0.5 sec | Quick back-and-forth conversation needs shorter minimum to keep natural flow |
| Solo Commentary | -40 dB | 0.7 - 1.0 sec | Longer pauses between thoughts can be removed without affecting speech |
| Noisy Environment | -50 to -60 dB | 0.5 - 0.7 sec | Lower threshold catches true silence even with background noise present |
| Panel Discussion | -35 to -40 dB | 0.4 - 0.6 sec | Multiple speakers create varied audio levels, moderate settings work best |
| Educational Content | -40 dB | 0.8 - 1.2 sec | Thoughtful pauses for emphasis should stay, only remove long dead air |
Troubleshooting common issues
Too much audio getting cut
If the tool is removing parts of speech or breathing sounds you want to keep:
- Increase the threshold from -40 dB to -35 dB or -30 dB
- Increase minimum duration from 0.5 sec to 0.7 or 1.0 sec
- Check that your microphone levels during recording were not too low
Not enough silence removed
If awkward pauses and dead air are still present after processing:
- Lower the threshold to -45 dB or -50 dB to catch quieter sections
- Decrease minimum duration to 0.3 or 0.4 seconds
- Make sure you selected the correct clip before opening the tool
Choppy or unnatural sounding results
If your edited podcast sounds too choppy or unnatural:
- Use a longer minimum duration like 0.8 to 1.0 seconds to preserve natural pauses
- Consider manually reviewing the red highlights before applying
- For conversational content, shorter minimum durations can make dialogue feel rushed
No silence detected
If the analysis shows zero silence regions found:
- Your video might have constant background noise preventing detection
- Try lowering the threshold significantly to -60 dB or -65 dB
- Decrease minimum duration to 0.2 seconds to catch shorter pauses
- Consider using noise reduction on your audio before silence removal
Frequently asked questions
Does removing silence affect video quality?
No, removing silence only cuts out quiet sections of your video. The remaining video and audio quality stays exactly the same as your original recording. The process splits and rearranges clips without re-encoding or compressing the actual media until you export the final result.
Can I undo silence removal if I don't like the results?
Yes, the editor has an Undo function that reverses the silence removal. Press Ctrl+Z (or Cmd+Z on Mac) or use the Edit menu and select Undo. This restores your timeline to the state before you clicked Apply. You can then adjust settings and try again with different parameters.
How long does the silence detection process take?
Analysis happens quickly since it is processed locally in your browser. A typical 60-minute podcast video takes 10-30 seconds to analyze depending on your computer's speed. The actual application of cuts after clicking Apply usually takes just a few seconds regardless of video length.
Will this work with video podcasts that have multiple speakers?
Yes, the silence removal tool works with multi-speaker podcasts. It detects silence based on overall audio levels, so as long as there are actual silent sections between speakers talking, the tool will find and remove them. For panel discussions or interviews, you might want to use shorter minimum duration settings around 0.3 to 0.5 seconds.
Can I manually adjust specific cuts after automatic removal?
Yes. After the automatic silence removal, your timeline shows all the cuts as individual clips. You can manually adjust any of them by selecting a clip and using the split tool, moving clips around, or deleting specific sections. The automatic removal gives you a starting point that you can fine-tune by hand if needed.
Ready to remove silence from your podcast videos?
Open VidTL Video Editor