How to Combine Multiple Videos Together Online & For Free
Combine multiple clips into one video without losing resolution or detail.
Merging video clips often produces blurry, pixelated results. The cause is usually the export settings, not the merge itself. Once you know which settings control quality, you can combine clips that look as sharp as the originals.
VidTL lets you set resolution, bitrate, and codec directly. This guide walks through those settings so your merged video keeps the highest quality your source footage allows.
Why quality loss happens when merging videos
Four settings cause most quality problems. Fix them and the merge holds up.
- Compression applied twice. Your source videos are already compressed. Exporting the merge compresses them again, and each pass removes information.
- Wrong resolution. Exporting below your source resolution downscales the footage. A 4K video exported at 1080p loses 75% of its pixel information permanently.
- Low quality slider values. The quality setting controls how much compression is applied. Low values create smaller files but introduce artifacts, banding, and blur that show up on larger screens.
- Incompatible codec choices. Some codecs prioritize file size over quality. The wrong codec causes loss even when the other settings are correct.
Step-by-step guide to merge videos without losing quality
1. Import your video clips
Open VidTL in your browser and click the **Import** button in the media library panel on the left. Select all the clips you want to merge. Hold Ctrl (Windows/Linux) or Cmd (Mac) to select multiple files at once.
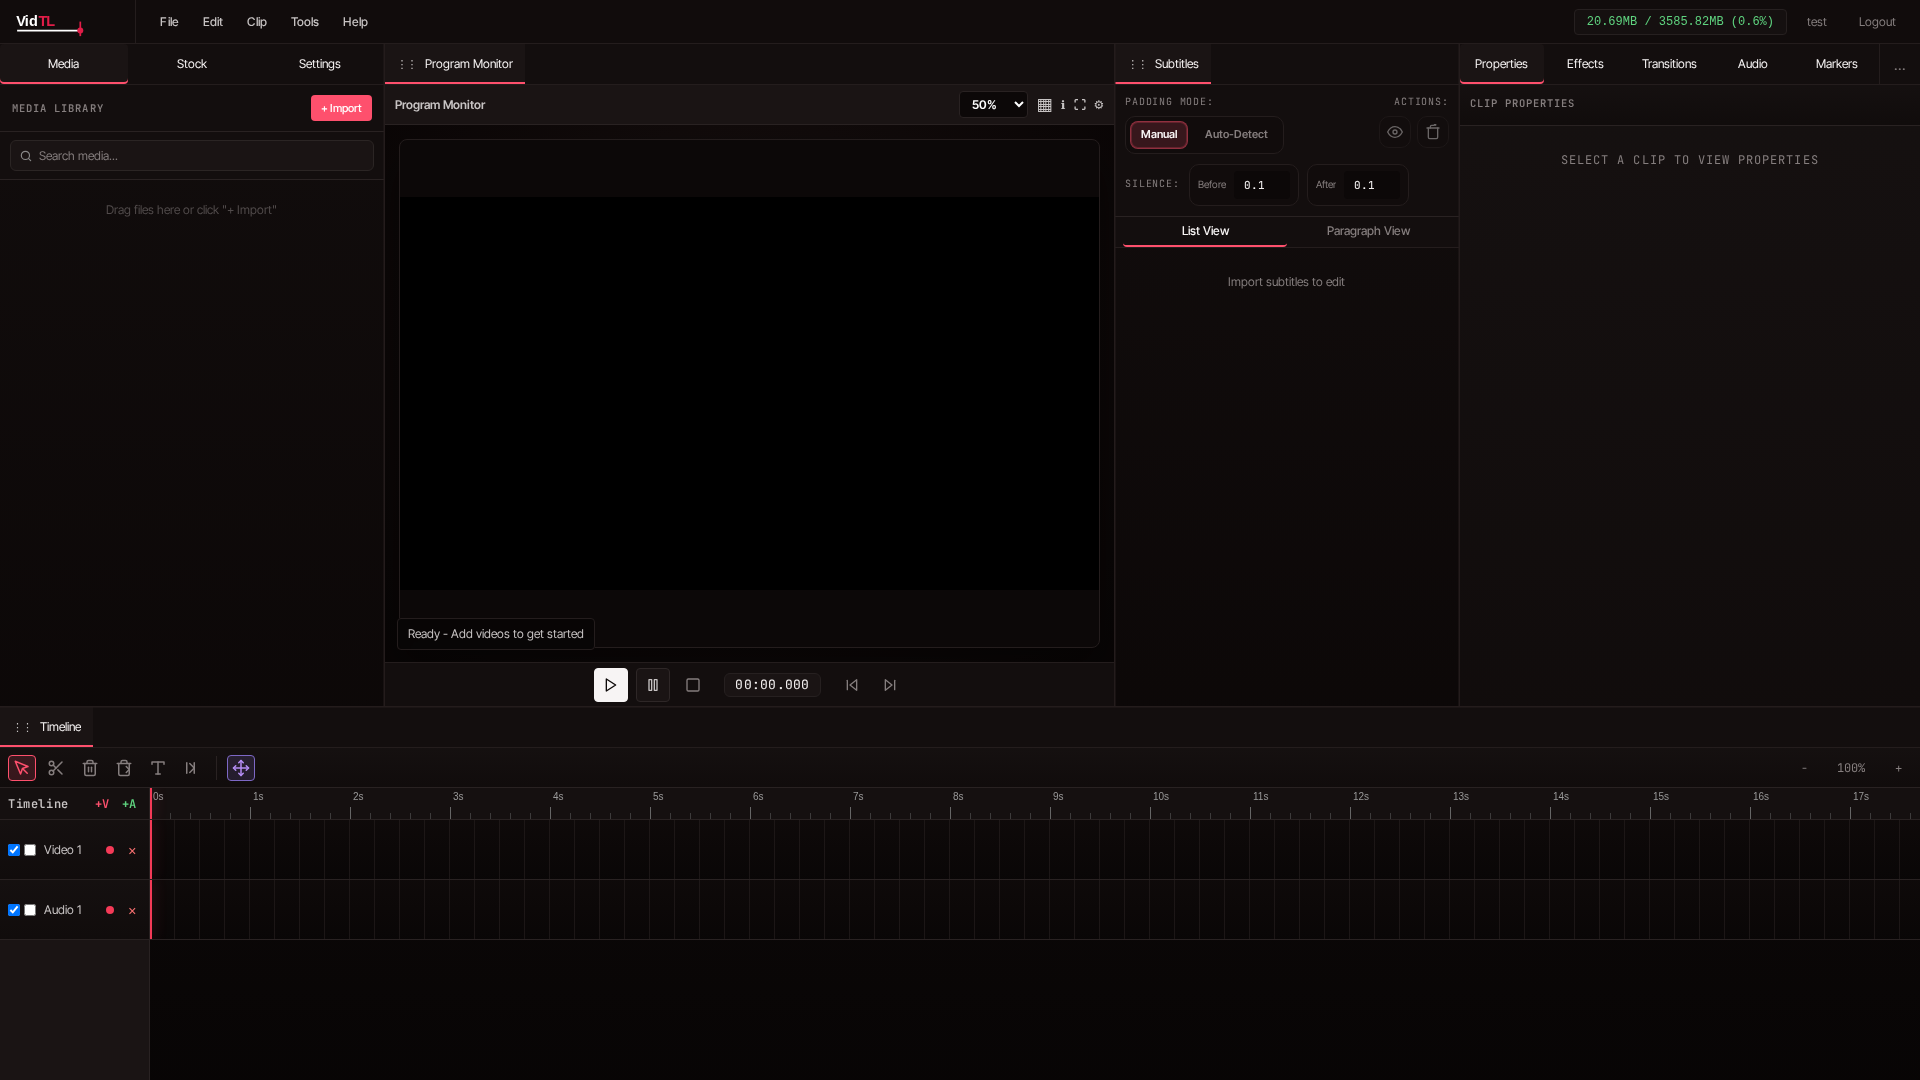
After importing, your clips appear as thumbnails in the media library. Each thumbnail shows a preview frame and the clip's duration.
2. Add clips to the timeline in order
Drag each clip from the media library onto the timeline at the bottom of the screen. Place them in the order you want them to appear in the final video. The first clip goes on the left, followed by the second, third, and so on.
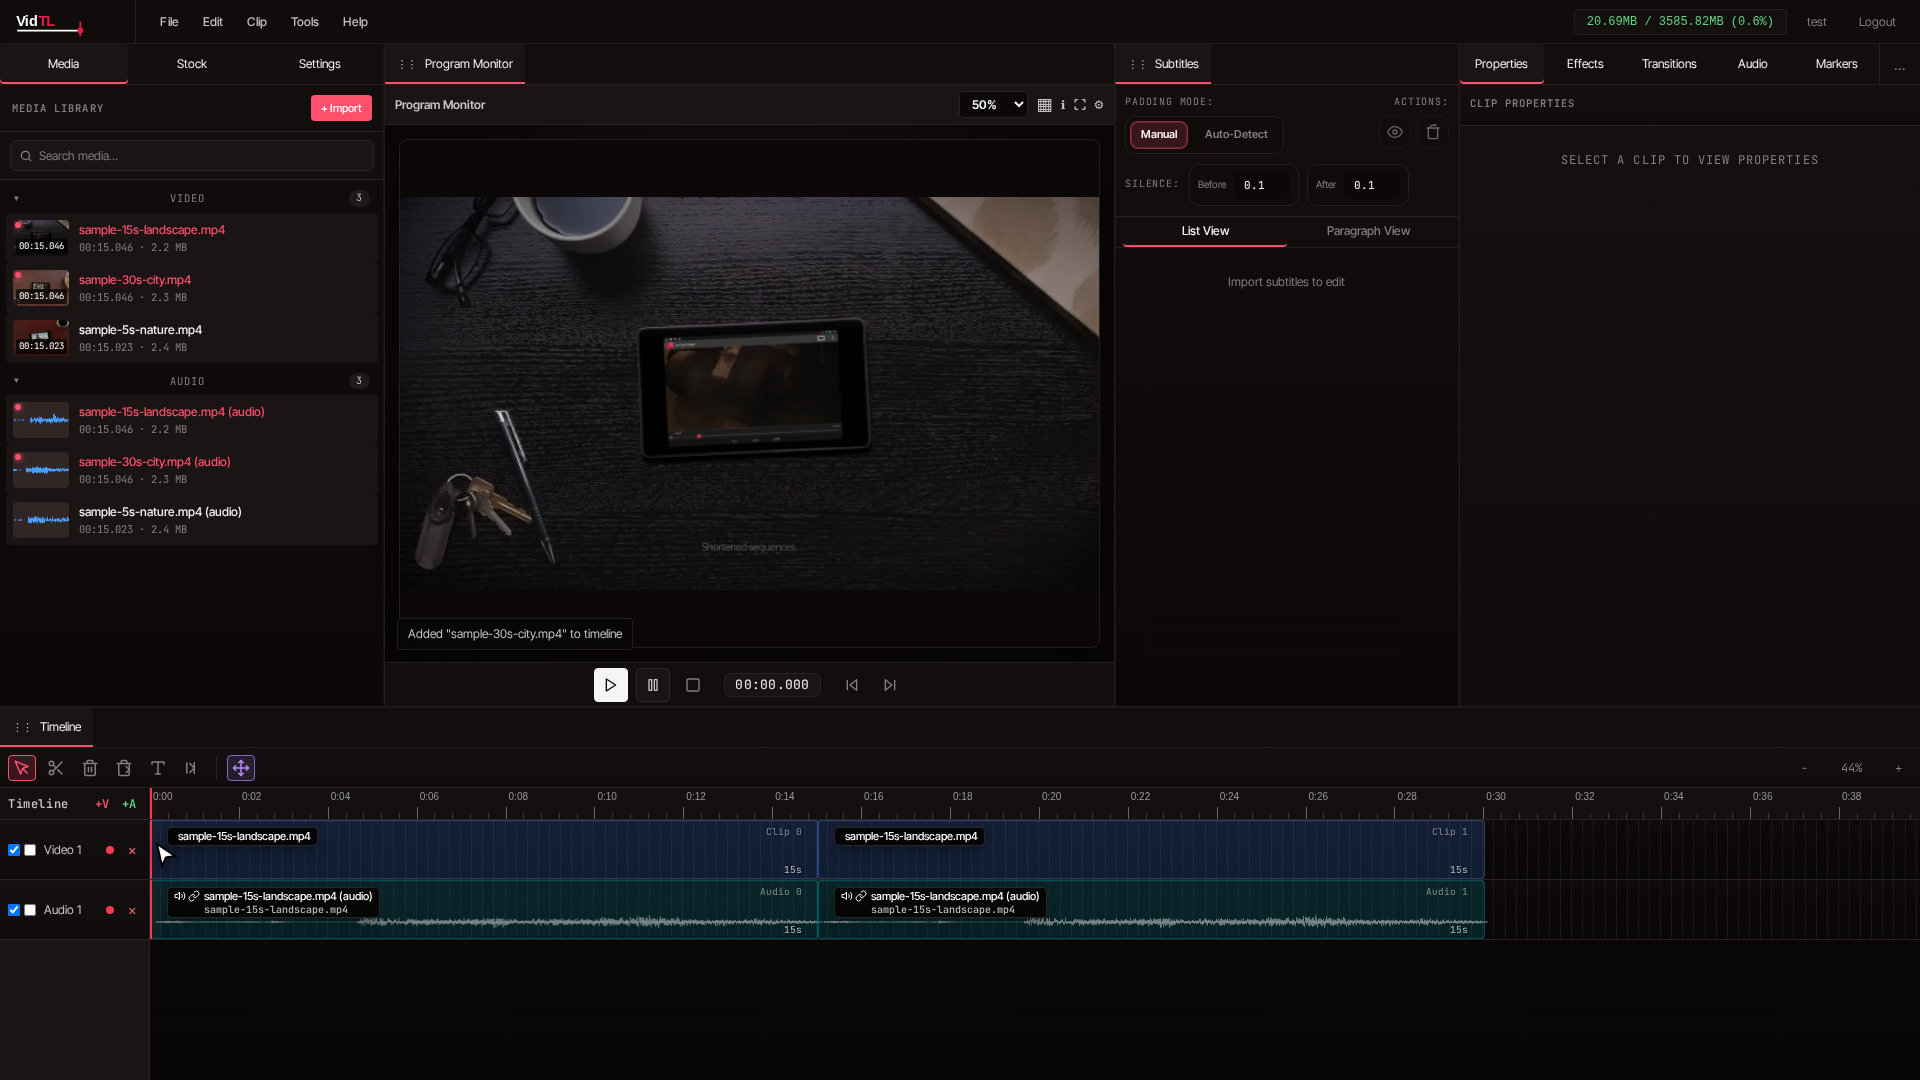
Make sure there are no gaps between clips unless you want black frames in the final video. The clips should touch end to end.
Use the zoom controls on the timeline to see your clips more clearly and confirm they are aligned.
3. Check your project resolution
Before exporting, verify that your project resolution matches your highest quality source video. Look at the resolution dropdown in the top toolbar. For 1080p videos, set it to 1920x1080. For 4K footage, use 3840x2160.
The project resolution determines the output size of the merged video. Setting it lower than your source clips forces downscaling, which permanently reduces quality. Match your best source resolution.
4. Open the export dialog
Click the **File** menu in the top left corner and select **Export Video** from the dropdown. This opens the export settings dialog where you control the quality of the final video.
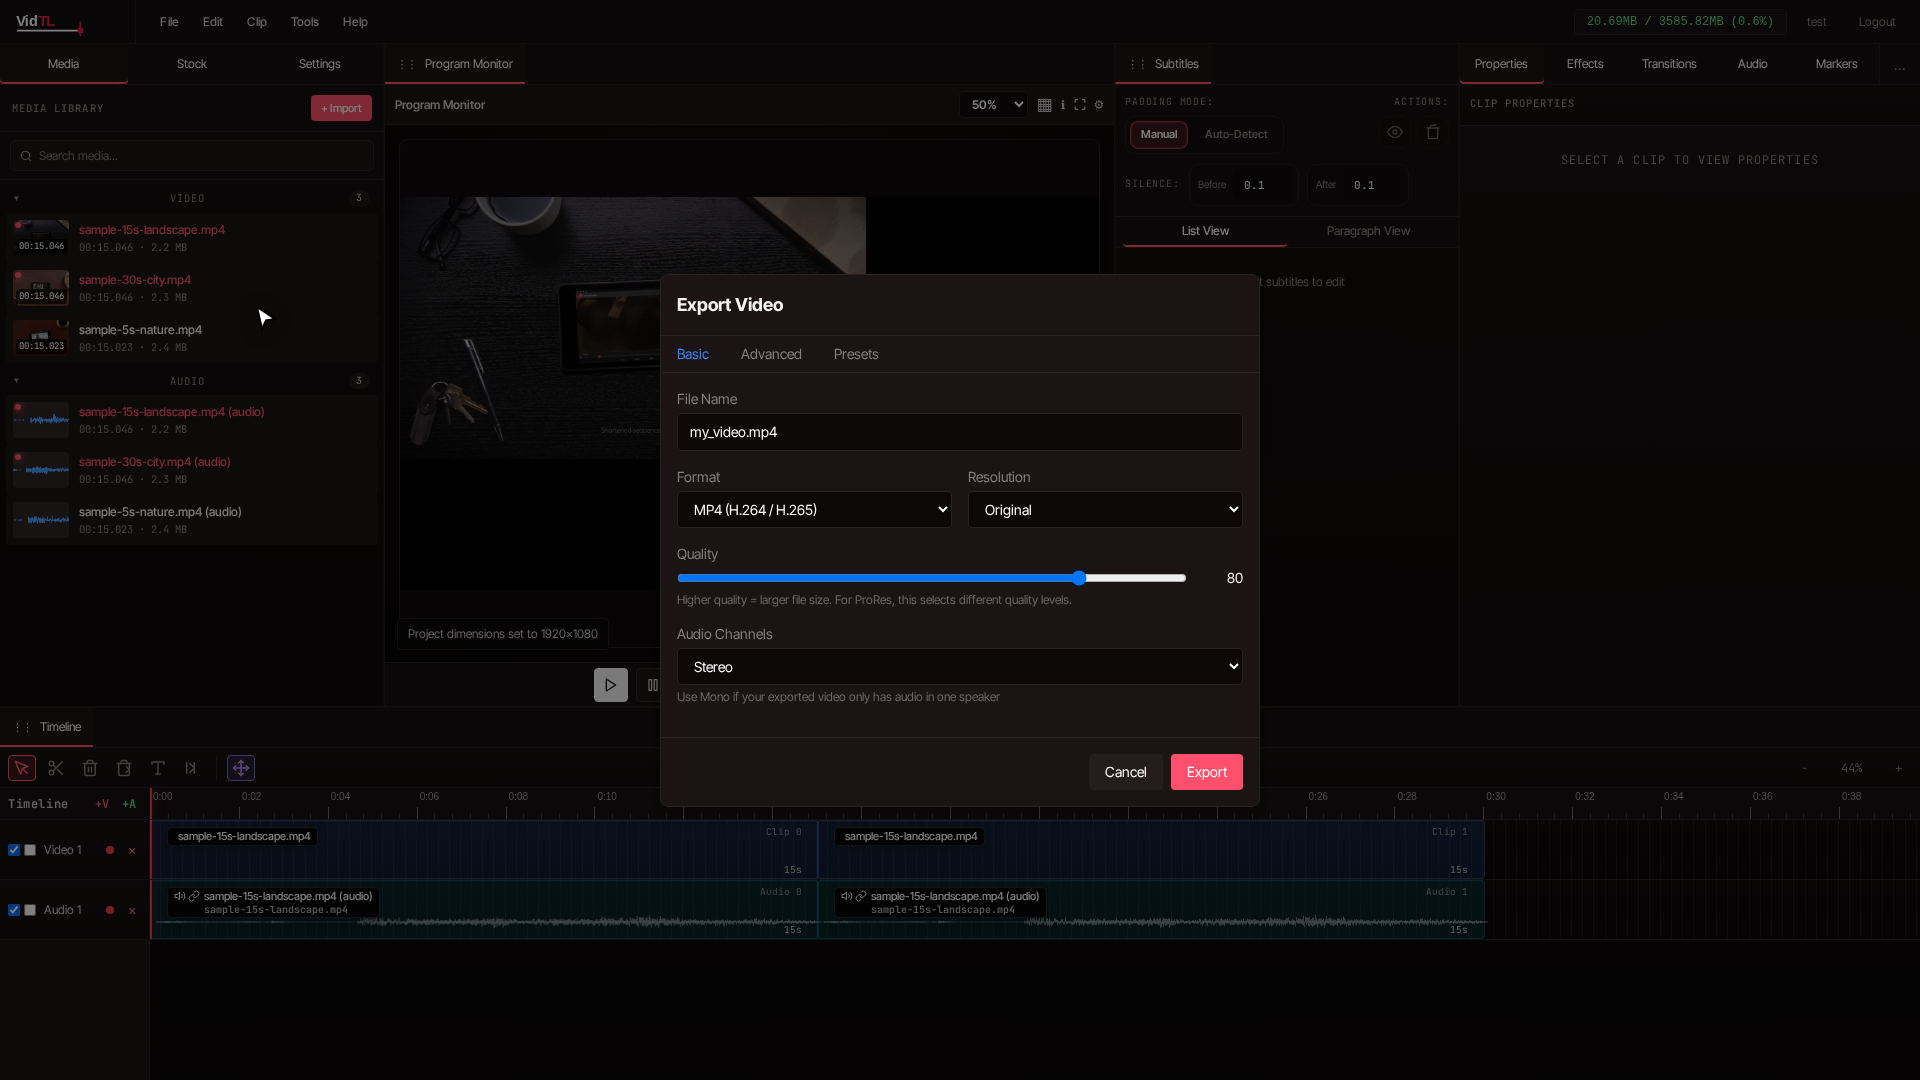
5. Configure export settings for maximum quality
Three settings matter most in the export dialog.
Resolution. Select the same resolution as your source videos. If you mixed different resolutions, choose the highest one. Never select a lower resolution than your best clip.
Quality slider. Move the slider to at least 80 for high quality output. For merging without any quality loss, set it to 90 or higher. Values above 95 produce files very close to the original quality but with larger file sizes. The difference between 80 and 90 is noticeable on large displays. For professional work, stick with 90 or above.
Format. MP4 works for most purposes and maintains excellent quality when the quality slider is set high. For the best quality regardless of file size, switch to the **Advanced** tab and select the H.264 codec with a high bitrate.
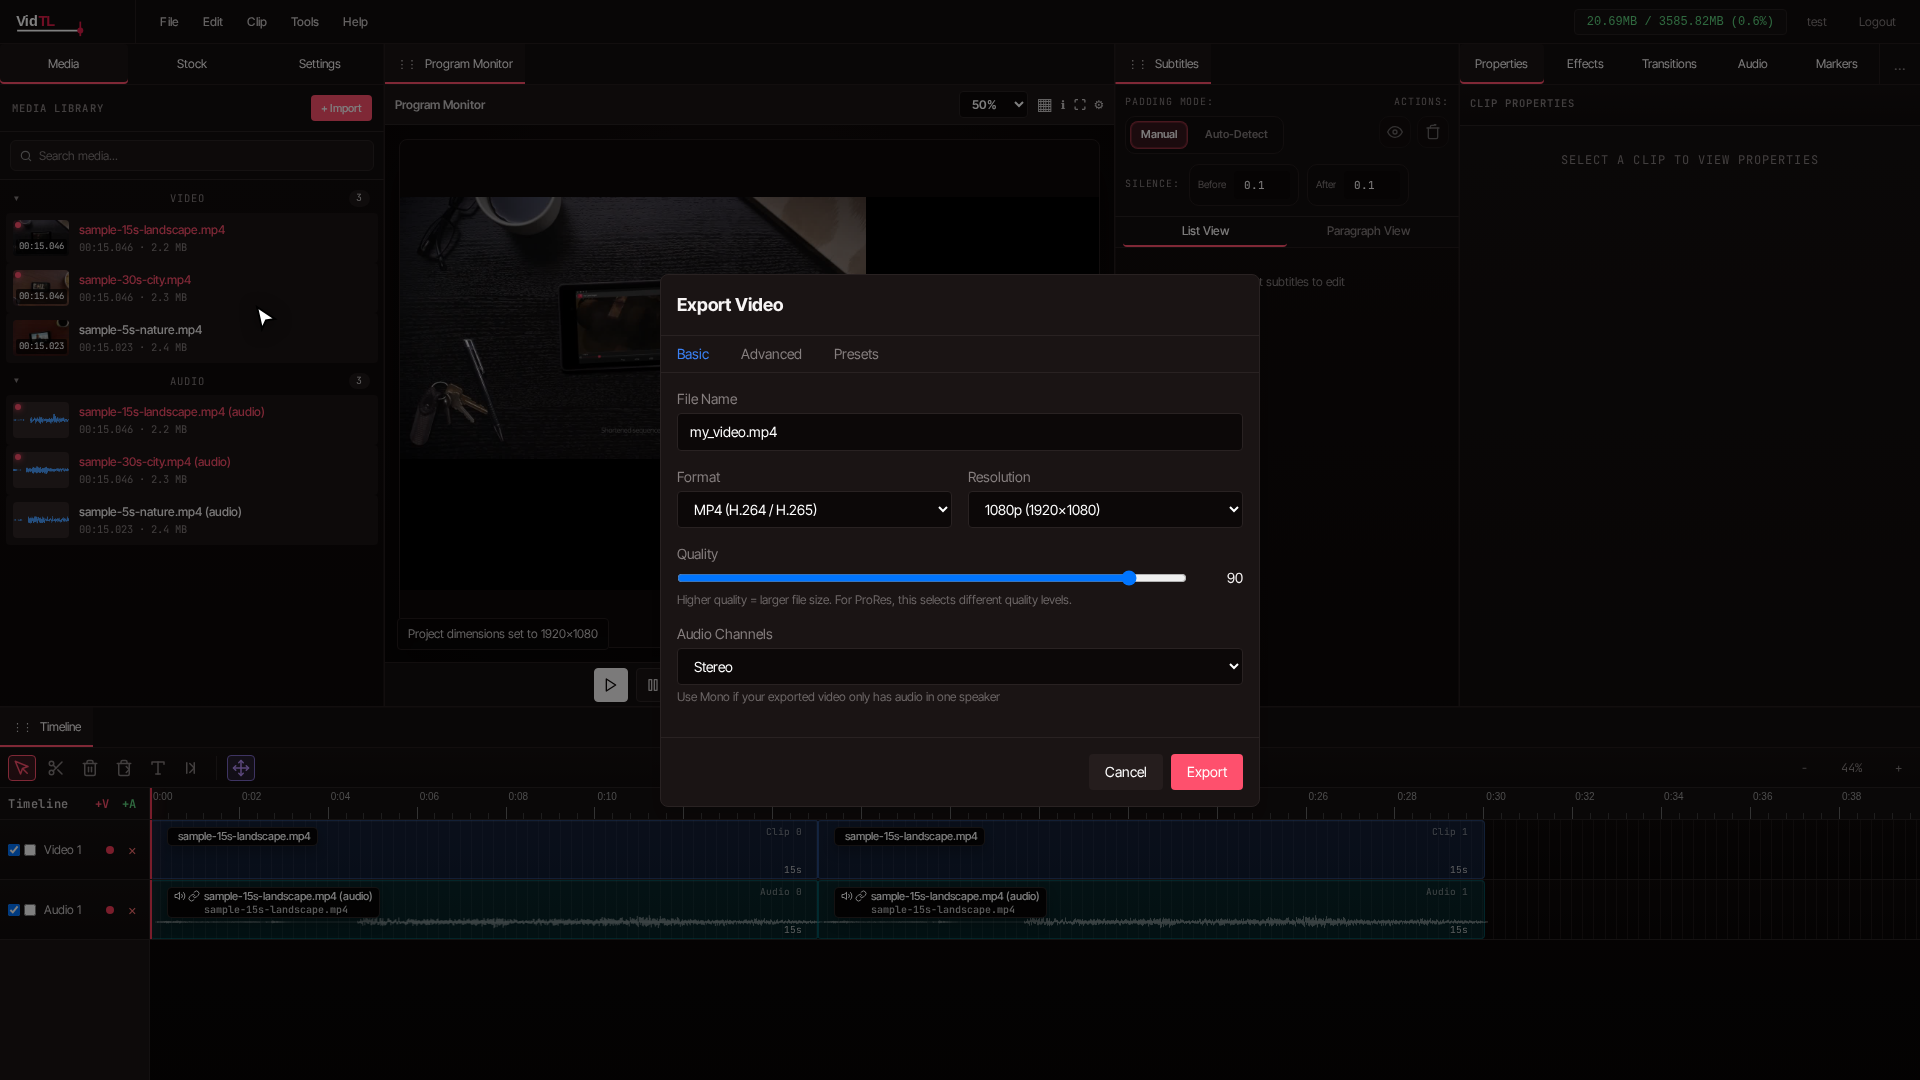
6. Choose advanced settings (optional)
For complete control over quality, click the **Advanced** tab in the export dialog. Here you can manually set the video codec, framerate, and other parameters.
- Video Codec: H.264 provides the best balance of quality and compatibility. H.265 (HEVC) offers better compression but may not play on older devices.
- Framerate: Match the framerate of your source videos. If your clips were shot at 30fps, export at 30fps.
- Audio Channels: Keep stereo (2 channels) for standard videos. Only change this if you are working with surround sound or mono audio.
If you are unsure about advanced settings, the **Basic** tab with a quality slider of 90 or higher gives excellent results for merging videos.
7. Export your merged video
Give your file a descriptive name and click the **Export** button. VidTL processes your timeline and creates a single video file containing all your clips merged together. Processing time depends on the length of your videos and your selected quality settings.
Once complete, open the merged video and compare it to your original clips. With the right settings, you should see no visible difference in sharpness, color, or detail.
Export settings for maximum quality
| Setting | Recommended value | Impact on quality |
|---|---|---|
| Quality Slider | 80-100 | Higher values preserve more detail and reduce compression artifacts. Below 60 causes visible quality loss. |
| Resolution | Match source (e.g., 1920x1080) | Exporting at lower resolution than source permanently loses pixel information. Never downscale unless necessary. |
| Video Codec | H.264 or H.265 | H.264 offers excellent quality and universal compatibility. H.265 provides better compression at the same quality. |
| Framerate | Match source (24/30/60fps) | Changing framerate can cause stuttering or unnatural motion. Always match your original footage. |
| Format | MP4 | Container format has minimal impact on quality when codec and quality settings are correct. |
Tips for best results when merging videos
- Use similar source videos. Merging videos shot with the same camera at the same settings produces the most consistent results. Mixing different resolutions or framerates forces the editor to convert some clips, which can reduce quality.
- Export once, not multiple times. Each export applies another round of compression. Plan your edits carefully so you only need to export once. Repeatedly importing and exporting the same footage multiplies quality loss.
- Consider file size vs quality. Higher quality settings create larger files. For YouTube or social media, quality 85-90 works well. For archival purposes or further editing, use 95-100 to preserve maximum detail.
- Preview before exporting. Play through your entire merged video in the preview window before exporting. Check that transitions between clips look smooth and that you did not accidentally leave gaps or overlap clips.
- Keep your originals. Never delete your source videos after merging. If you need to make changes later or export at different settings, having the originals saves you from working with already-compressed footage.
- Test with a short sample first. If you are merging long videos, test your export settings on a short section first. This lets you verify quality and file size before committing to a lengthy export process.
Frequently asked questions
What quality setting should I use to merge videos without any loss?
Set the quality slider to 95 or higher for results that are visually identical to your source videos. While no compression is truly lossless, quality settings above 95 preserve so much detail that the human eye cannot detect the difference. For professional work or videos you plan to edit further, use the maximum setting of 100. Higher quality settings create larger file sizes, so balance quality needs with storage constraints.
Can I merge 4K and 1080p videos together?
Yes, but you need to choose which resolution to use for the final video. If you set your project to 4K, the 1080p clips will be upscaled, which does not add detail but keeps everything at 4K resolution. If you choose 1080p, your 4K footage gets downscaled, permanently losing the extra resolution. For best results, set the project to 4K to maintain the quality of your highest resolution clips. The 1080p clips will not look worse than they originally did; they will just be scaled up to fit the 4K frame.
Why does my merged video look blurry even with high quality settings?
The most common cause is exporting at a lower resolution than your source videos. Check that your export resolution matches or exceeds your original footage. Another issue could be that your source videos were already low quality or heavily compressed. No export settings can recover detail that was never there. Finally, make sure you are viewing the exported video at actual size, not zoomed in. Videos can look blurry when displayed larger than their native resolution.
Does merging videos reduce quality even if I don't edit them?
Simply placing clips on a timeline and exporting does apply a new round of compression, which technically reduces quality. With proper settings (quality at 90 or higher, matching resolution and framerate), the quality loss is so minimal that you will not notice it in normal viewing. To minimize any quality impact, use the highest quality settings your storage allows and avoid re-exporting the merged video multiple times.
How large will my merged video file be?
File size depends on video length, resolution, quality setting, and codec. As a rough estimate, 1080p video at quality 90 uses about 8-12 MB per minute, while 4K at the same quality uses 40-60 MB per minute. Higher quality settings increase file size proportionally. If you are concerned about file size, export a one-minute test clip with your desired settings to calculate the per-minute size, then multiply by your total video length. You can also try the H.265 codec, which produces smaller files than H.264 at the same visual quality, though some older devices may have playback issues.
Start merging your videos at VidTL.com. No downloads, no accounts, just drag, drop, and export.