Free audio normalizer
Normalize audio in your video.
Open your video, choose Tools, then Audio, then Normalize Audio, and every clip is brought to the same comfortable level. Quiet ones come up, loud ones come down, and nothing distorts.
- Free, no account
- No watermark
- Stays on your computer
Listen for yourself
The same 21 seconds, before and after.
Leena's voice, turned up for the first seven seconds, down for the next seven and in between for the last seven. The after is the editor's own export. Footage: Leena, from Wikitongues (CC BY-SA 4.0), with the volume changed to show the problem.

Loud, then quiet, then in between. You would be reaching for the volume the whole way through.

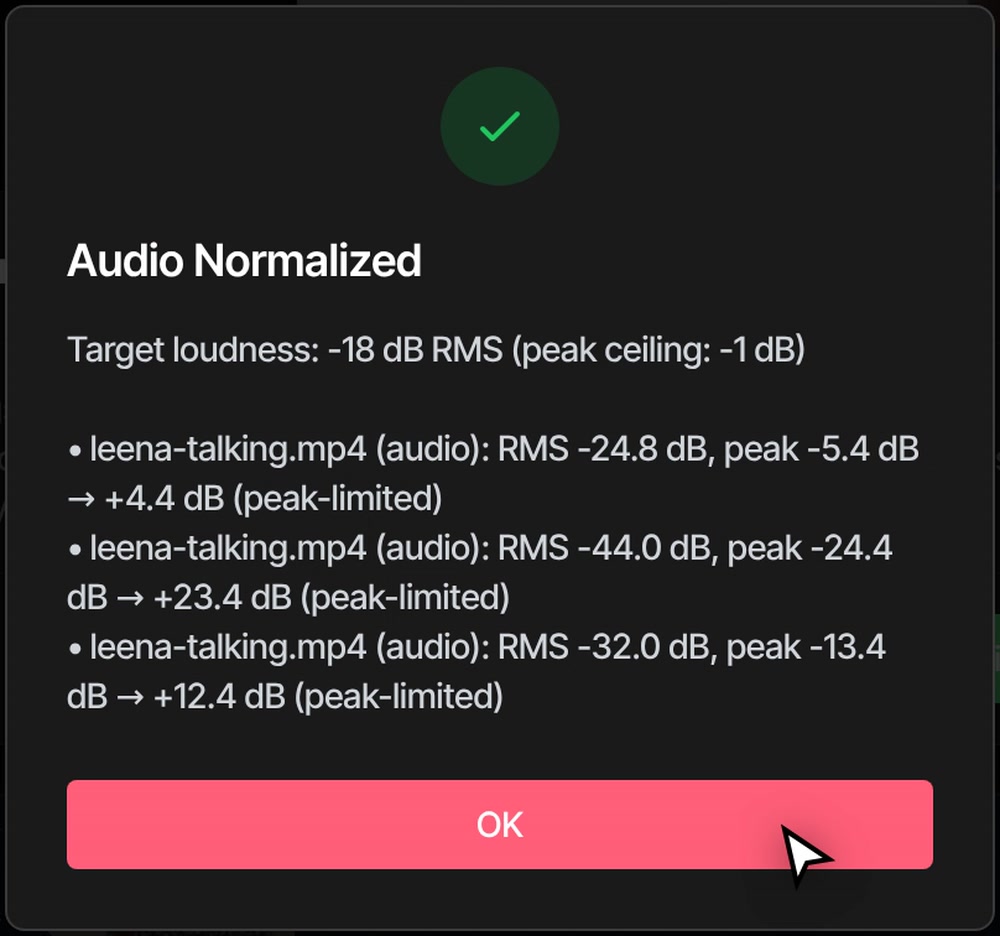
The same three parts, each brought to about the same level. The quiet middle part had to come up by 23 dB, which also raises any hiss under the voice.
Normalize Audio
Four steps to an even level.
-
01
Put your video on the timelineDrop the file into the editor and add it. Its sound shows as a waveform under the picture.
-
02
Split where the level changesClick the ruler in a pause and press S. Skip this if each clip is already about the same level inside.
-
03
Open Tools, Audio, Normalize AudioSelect the clips you want, or select nothing to take every clip on the timeline. Press Normalize.
-
04
Read the summary, then exportIt lists the change made to each clip. Undo puts every clip back. Save with File, then Export Video.
Good to know
What it does, and where it stops.
-
One level for each clip
Every clip gets a single volume change that brings its average level to -18 dB, with peaks kept under -1 dB so nothing clips. A very quiet clip can come up by as much as 40 dB.
-
Split a drifting clip first
It cannot even out a level that changes inside one clip, because the whole clip gets the same change. Split the clip where the voice gets louder or quieter, and each piece gets its own.
-
Choose which clips
Select some clips to change only those. Selecting a video clip includes its own sound. With nothing selected, every audio clip is changed, music too, and music brought up to the voice's level will drown it. Select the speech and leave the music out.
-
Only what is on the timeline
It measures the part of the recording you kept, so a clip trimmed to its best minute is judged on that minute. Silent clips are skipped, and a clip already at the target is left alone.
-
Easy to undo or adjust
It only changes each clip's volume, and your original file is never touched. Undo brings every clip back in one step. To nudge a clip afterwards, change its Volume in Clip Properties.
-
A second way, at export
In File, Export Video, open the Advanced tab and tick Normalize loudness. The finished video's overall loudness is set to -16 LUFS with peaks held under -1.5 dB. Your timeline stays as it is.
Questions
Before you try it
Is normalizing audio free?
Yes. Normalize Audio works without an account, exports have no watermark, and videos can be any length. It runs on your own computer, so your footage is not uploaded.
Will it make my video louder?
If it is quiet, yes. If it is already loud, the clip comes down instead. Each clip is moved toward the same average level, and the loudest moments never go past -1 dB, so the sound does not distort.
Can I pick the target level?
Not in the Normalize Audio window, which has one button and one target. To go louder or quieter, change a clip's Volume in Clip Properties afterwards, or use the Normalize loudness option when you export.
What about the hiss in a very quiet recording?
Raising a clip raises everything in it, background noise included. If the hiss gets in the way, remove the background noise from the clip first or afterwards.
Does it work on MP3 and WAV files?
Yes. Any sound on the timeline is an audio clip, whether it came with a video or from an MP3 or WAV you added. Normalize Audio treats them all the same way.
Can the AI assistant do it for me?
Yes. Ask the AI assistant to even out the volume and it runs the same tool. The assistant is part of Pro, and the Normalize Audio tool itself stays free. See pricing.
Also for your sound
- How to normalize audio The step-by-step guide, with tips for podcasts, interviews and mixed clips.
- Remove background noise Take out the hum and hiss that come up with a quiet recording.
- Voice isolator Pull the voice away from music and room sound before you set its level.
- Merge videos Clips from different cameras rarely match in volume. Join them, then even them out.
- Add music to video Lay a track under your voice and keep it from drowning the words.
- Remove silence Cut the dead air out of a talking video in one pass.
Every clip, the same volume.
Free, no account, no watermark, and your video stays on your computer.