Free online color correction
Color correct video in your browser.
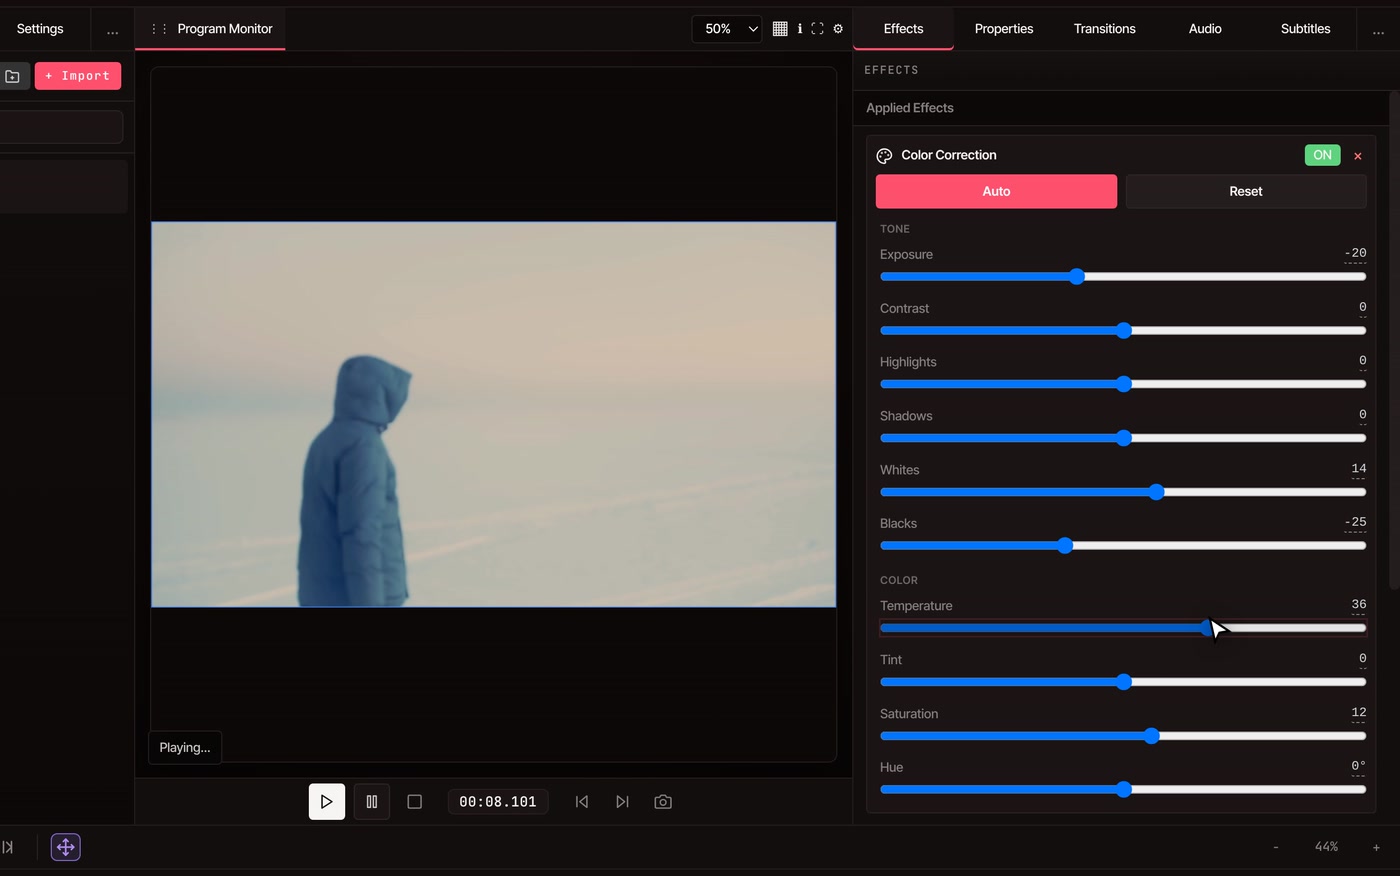
Select a clip, add Color Correction and press Auto to fix flat light and color casts. Then adjust ten sliders by hand and switch the effect off and on to compare.
- No account to start
- No watermark
- Your video stays on your computer
How it works
Four moves, all in the Effects tab.
-
01
Add Color Correction.Click the clip on the timeline, open the Effects tab on the right, and click Color Correction under Add Effect.
-
02
Press Auto.VidTL looks at three frames across the clip and moves only what is clearly off: how dark the darks are, how bright the brights are, overall brightness, contrast, color cast and color strength.
-
03
Adjust by hand.Drag a slider while the clip plays and the picture follows. Click the number beside a slider to type an exact value. Temperature is the quickest way to warm up or cool down a shot.
-
04
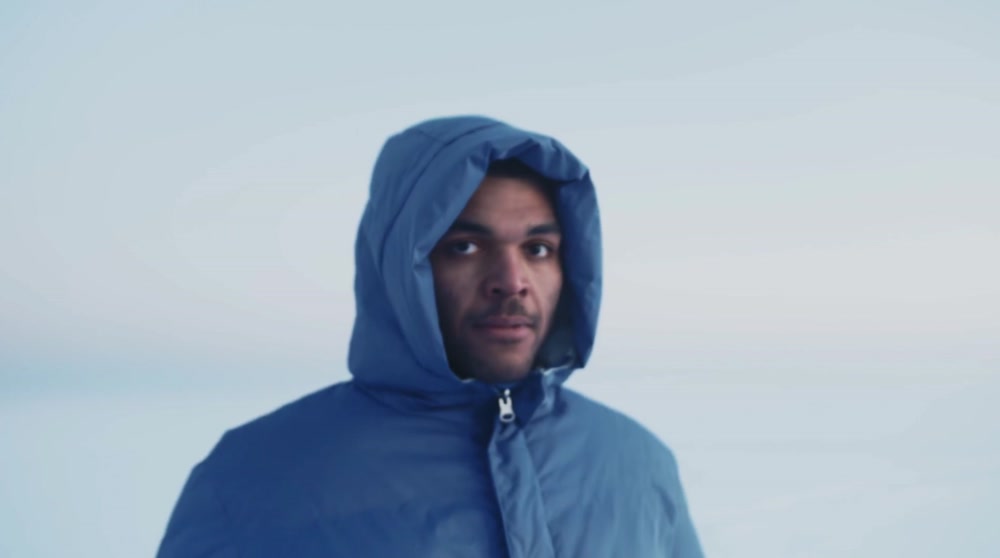
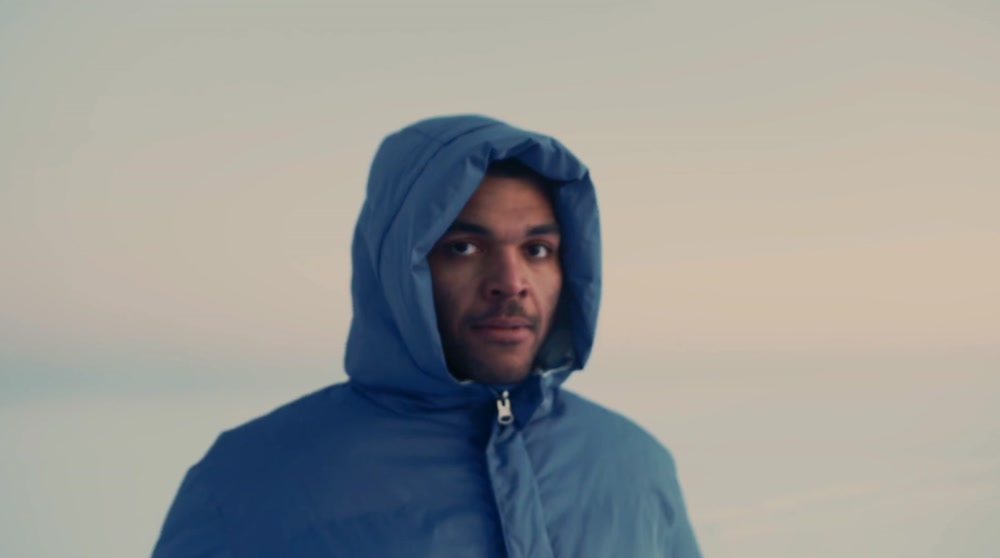
Compare with the original.Switch the effect OFF to see the clip as shot and ON to see your grade. Reset puts all ten sliders back to zero, and any change can be undone.
The result
One frame, before and after.
What you can change
Ten sliders, in plain words.
Every slider runs from -100 to 100 and starts at 0, which changes nothing. Hue is the one exception: it turns the colors up to 180° either way.
-
Exposure
Lightens or darkens everything at once. Start here when the whole clip is too dim or too bright.
-
Contrast
Pushes the light and dark parts apart for punch, or pulls them together for a softer look.
-
Highlights and Shadows
Highlights changes only the bright parts and Shadows only the dark ones. Pull Highlights down to tame a bright sky, or lift Shadows to open up a dark face.
-
Whites and Blacks
Whites sets how bright the brightest parts get, and Blacks how deep the darkest parts go. Lowering Blacks clears a hazy, washed-out look.
-
Temperature and Tint
Temperature moves the picture between cool blue and warm orange. Tint moves it between green and magenta. Use them to cancel a color cast, or to set a mood.
-
Saturation and Hue
Saturation sets how strong the colors are, and -100 gives black and white. Hue turns every color around the color wheel at once.
Questions
Color correction, answered.
Is color correction free?
Yes. Color Correction, Auto and all ten sliders work without an account, and the exported video has no watermark. Exports go up to 8K at any length on every plan. Pro adds the AI assistant, which can set these same sliders when you ask it to warm up or brighten a clip.
What does Auto change, and when does it leave a clip alone?
Auto can set Exposure, Contrast, Whites, Blacks, Temperature, Tint and Saturation, and only when the clip is clearly off. A clip that is already balanced comes back close to untouched. It leaves Highlights, Shadows and Hue at zero because those are matters of taste. Treat it as a starting point and finish with the sliders.
How do I give several clips the same look?
Select the clips, add Color Correction, and the sliders move all of them together. Or grade one clip and press Copy to All to put its effects on every other clip on your video tracks, which replaces any effects those clips had. Copy to Selected does the same for just the clips you have selected.
Can I change the color of only part of a clip?
By time, yes. Split the clip where the light changes. Both parts keep the grade, and each has its own sliders, so you can adjust one without moving the other.
Does the color stay when I export?
Yes. File, then Export Video, makes the file from the same picture you see in the preview, with the grade in it. The original footage is never changed, so you can remove the effect later and start again.
What can’t it do?
There are no color wheels, curves, scopes or LUT files, and the sliders can’t change over time, so a clip has one look from its first frame to its last. It is also one set of sliders per clip: for a different look in the middle of a shot, split it and give the pieces different settings.
Around the grade
- Brightness guide A step-by-step guide to lifting a dark or flat clip.
- Online video editor Trim, caption and export from the same timeline.
- AI video editing assistant Ask for a warmer look in plain words. Part of Pro.
- Video stabilizer Steady a shaky shot before you grade it.
- Green screen video editor Take out a solid backdrop, then grade the shot.
- Compress video Make the graded file smaller before you send it.
Make it look the way you saw it.
No account to start, no watermark, nothing to install.