Tutorial video maker
A free tutorial video maker, from recording to finished lesson.
Record your screen, your webcam and your voice in the browser. Zoom in on the clicks, add step banners and captions, then export the whole lesson or one video for each step. No watermark, nothing to install.
- Free, no account
- No watermark
- Nothing to install
How it works
Record the lesson, finish it in one place.
-
01
Record it.Press the record button on a video track and choose Screen, Webcam or Screen + Webcam. Talk it through as you go.
-
02
Zoom in on the clicks.Select the recording and open Tools › Video › Auto Zoom. Press Find Activity, then Add Zooms.
-
03
Label the steps.Open the Graphics tab and click a Step Banner or a Pointing Arrow to add it at the playhead, then retype its words.
-
04
Mark where each step starts.Put the playhead there, press Add Marker in the Markers panel and give the step a name.
-
05
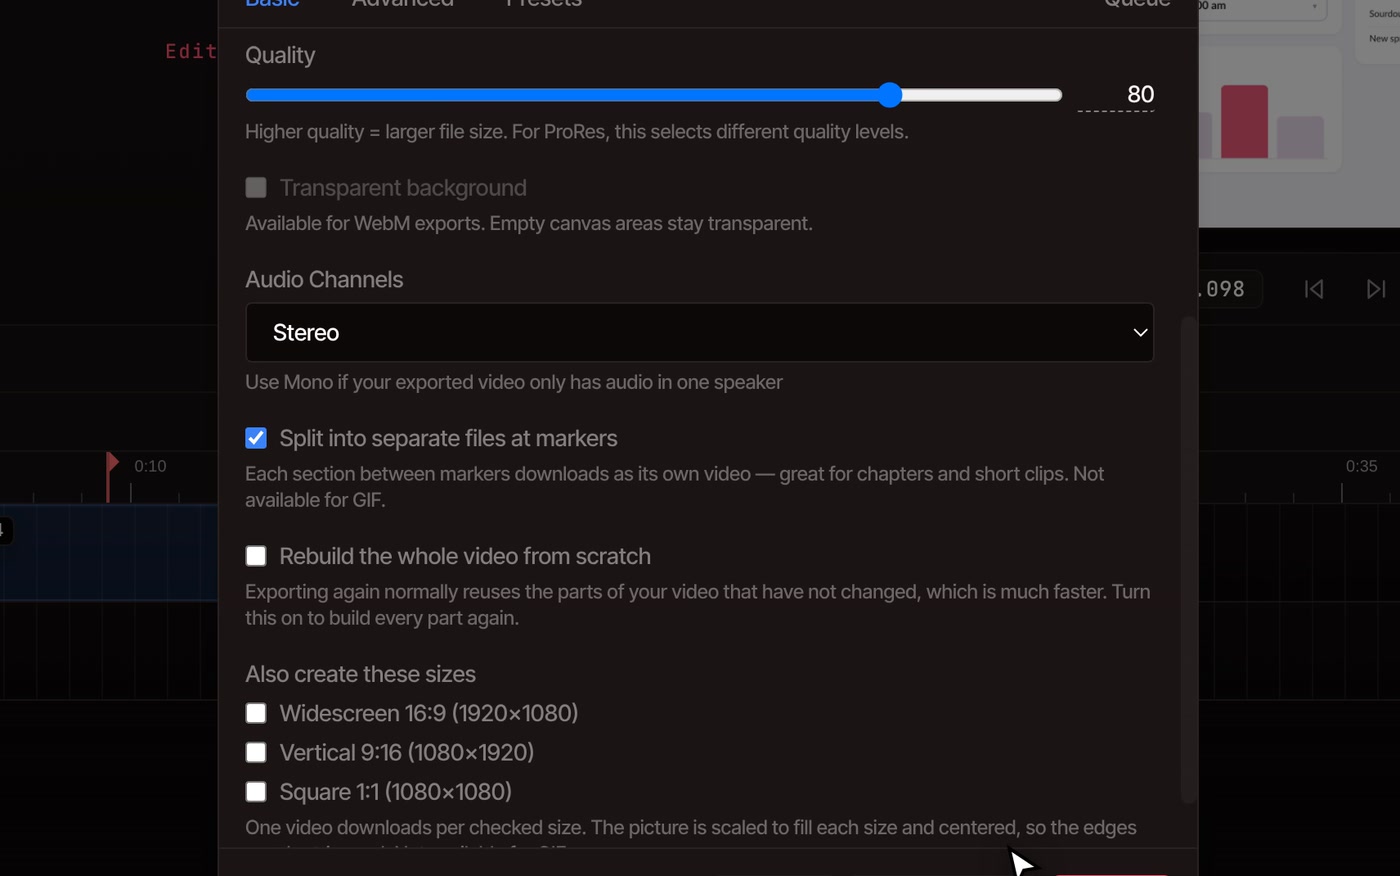
Export.File › Export Video. Tick Split into separate files at markers for one video per step, or leave it off for the whole lesson.
Lessons and courses
One recording, a video for each step.
Short lessons get watched. Record the whole walkthrough in one go, add a marker where each step starts, and the export cuts there. Three markers make four videos, and every one is ready to upload.
- The name you give a marker goes into the file name, cleaned up and cut to 40 characters. The first part has no name, only its number.
- It makes separate files. It does not put a chapter menu inside one video.
- It is not available for GIF, and it cannot be combined with Also create these sizes.
- Your browser may ask you to allow several downloads at once. Say yes.
What the demo exported
Markers named Write the post, Pick a day and Schedule it, and an export called plume-lesson. These are the four files that came out.
- plume-lesson_part1.mp4 Title card
- plume-lesson_part2_Write-the-post.mp4 Step 1
- plume-lesson_part3_Pick-a-day.mp4 Step 2
- plume-lesson_part4_Schedule-it.mp4 Step 3
Building a course? A project can hold several timelines, one per lesson. Pick which one to export in the export window.
What a lesson needs
Make every step easy to follow.
-
You and the screen
Screen + Webcam puts your face in the bottom-right corner, on a track of its own. Move it, resize it or hide it like any clip. The webcam recorder page has the details.
-
Zoom where you click
Auto Zoom watches the recording for typing, menus and messages and zooms in on each, so viewers see the small buttons you are pressing.
-
Banners and arrows
The Graphics tab has a Step Banner, a Pointing Arrow, a Highlight Circle and a Keyboard Shortcut. Change their words, colors and timing afterwards. More in motion graphics templates.
-
Talk it through
Your voice is recorded with the webcam, and with a screen recording when the shared screen has no sound of its own. To redo a line later, record over the playing timeline. On Pro, AI voice over turns a script into a voice.
-
Captions for muted viewers
Many people watch lessons without sound. The editor writes captions from your voice, and you fix any word by typing. Auto captions are free with a free account.
-
Cut the stumbles
Trim the false start, split out a cough, or run Remove Silence to close the pauses while you were thinking. Everything stays on one timeline.
Free, with a Pro option
Recording, Auto Zoom, step banners, markers and the split export are free. Pro adds the voice from a script and an AI assistant.
You do not need an account to record, zoom, add banners, mark steps and export. Captions need a free account with a confirmed email. On Pro you can type a script and get a voiceover, or ask the AI assistant to do edits for you, like adding captions. Every plan exports without a watermark, at any length.
See plansQuestions
Before you record a lesson.
Is the tutorial video maker free?
Yes. You can record, zoom, add banners, cut and export without an account, and nothing you export has a watermark. Captions are free with a free account. Pro adds voiceovers from text and the AI assistant.
Can I record my screen and my face at the same time?
Yes. Press the record button on a video track and choose Screen + Webcam. Your browser asks which screen, window or tab to share, and for your camera and microphone the first time. It works on a desktop or laptop computer in Chrome, Edge, Brave, Arc and Firefox. The editor does not run on phones.
Will it record my voice and the sound from my computer?
Your microphone is recorded with the webcam. A screen-only recording uses your microphone when the screen you share has no sound of its own. If you share a tab in Chrome or Edge, you can include that tab’s sound. Whether a whole screen or a window brings sound depends on your browser and computer.
How do I split a long tutorial into separate videos?
Move the playhead to where each step begins, press Add Marker in the Markers panel and name it. Then open File › Export Video and tick Split into separate files at markers. Each section between markers downloads as its own video.
Can I fix a mistake without recording again?
Often, yes. Cut the stumble out with the Cut tool, or run Remove Silence to close the pauses. For a wrong word in a voiceover, record that line again over the playing timeline and trim it into place.
Can I keep a whole course in one project?
A project can hold several timelines, shown as tabs above the timeline, so each lesson can have its own. The export window has a Timeline list for choosing which one to export.
Does my recording leave my computer?
Not for recording, zooming, banners, markers or export: that all happens on your computer. Footage leaves it only if you save to cloud storage or use a tool that runs on VidTL’s servers, like Pro’s faster captions.
What can I export?
MP4, MOV, WebM or GIF, at up to 8K. Pick a size in the resolution list of the export window, for example 1080p for a course platform. Splitting at markers works for every format except GIF.
Next, in the same editor
- Screen recorder Record your screen, with your webcam if you like, straight onto the timeline.
- Auto zoom Zoom in on your clicks and typing without keyframing by hand.
- Motion graphics templates Step banners, arrows, titles and name tags you can retype.
- Auto captions Captions timed to your words, free with a free account.
- Voiceover recorder Talk over the video while it plays, onto an audio track.
- Product demos Walkthroughs with zooms, captions and titles.
Record the lesson, cut it into steps.
Free in your browser, with nothing to install and no watermark on your export.